Showing posts with label Product Review. Show all posts

Monday, May 7, 2018

Rebuilding “Ms. Merry” the Amerigo–Merry gets a step up!

This is post is likely going to be fairly short, compared to the previous chapters.   Sadly, I don’t have many photos handy of Miss Merry’s new steps  from when their installation was finished, so I’m going to have to try and please you with this meager offering, for now Smile.  
   
P1150736

When you last saw Merry’s stairs, they were being test fitted into place.   Sadly they had to spend a winter in storage before they could at last be installed in April.   Sadly, even though I got an early start in March to close up some stuff on Merry due to a strange turn of warm weather, my progress has been fairly poor, due to either long bouts of sickness brought on by Oysters from the Oregon coast that for years have never given me grief, but now seem to be my baine.  

Since last August, the underfloor paneling was installed after painting, then the spray skirt that protects the stiffener beam under Merry’s rear wall, then all the joints were caulked and the underside area received two more coats of flat black paint to ensure everything was well weather proofed.  

The result is this.  

new_stairs

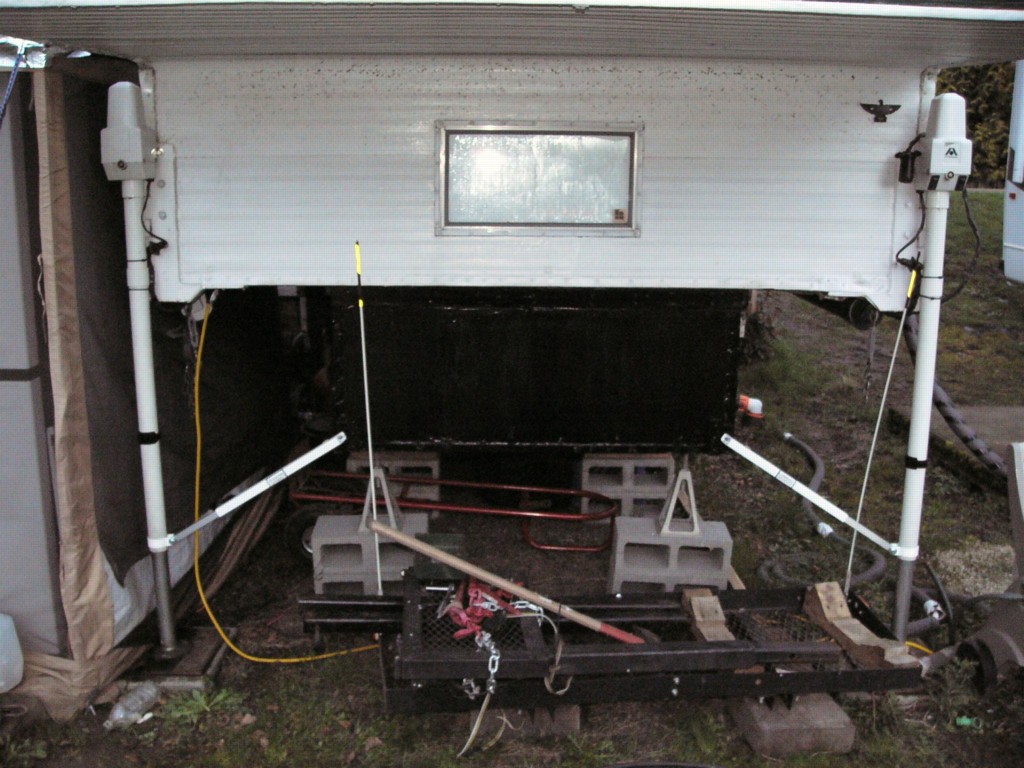
Merry’s stairs hang down a good deal lower than the originals did, so traveling with the hitch extension in is a definite must to act as a drag guard for the rear of the truck.    We’re already planning a rear cargo basket setup, which will use a dual receiver setup similar to the one on the front, for loading the generator and some other light gear onto for traveling, which will have a set of drag casters on it, similar to the rear end of a motorhome.  

With the new steps, you can now climb up into Miss Merry, when on flat ground (Our driveway is sloped, as its made from a berm that we were not allowed to flatten as it is part of the levy, so I still need a set of cinder blocks to step up to the stairs)  without needing a step stool to reach the first step.  

One of the large swing away style stair handles will be installed to help give climbers more stability than the smaller grab handle can by itself.  

Finding this particular folding stair set was actually rather difficult, as the Amerigo uses a fairly narrow stair, and most folding steps of this kind are designed for trailers, so they generally come with a wider tread, all of which were far too wide to fit in the space available on the underside of an Amerigo. 

In the end, I wound up at RV Parts Nation, who was the only place online I’d managed to locate these narrow, triple step folding stairs. 

1224-triple-manual-step-2-page-001

1224-triple-manual-step-page-001

The diagram is for the second SKU, which is 24” wide, but other than the tread width difference and subsequent housing width, different, the stairs are constructed the same.  

For the stairs I used, the SKU is 1220 and you can find them here: RV Triple Manual Entry Step

Thanks for Reading! Smile

Wednesday, October 5, 2011

Backlogged Projects: Water Pump Swap

Well, last of the backlogged projects, though truthfully, it’s actually early November as I write this, and this project happened quite some time ago.

Backlogged Project To-Do List:

1.) Charging System needs to be rewired (Again), converter relocated from under the kitchen sink to under the dinette, right next to the batteries (Something I should have done when I rewired the charging system back in 2009, but didn’t). Plus, a new Battery Disconnect needs to be installed, the original 75amp Pollack switch is falling apart.

Also, I need to incorporate my battery voltage meter center that I fashioned into the electrical system so I can actually watch my battery charge.

2.) The two Trojan SCS225 Deep cycles on the camper that I bought for a steal back in 2006 also need replacing, they no longer hold a good charge anymore, odds are one of the batteries is shorted.

3.) New Camper plugs need to be installed, replacing the under-rated RV 7 pin hook up with a 100amp Lift-gate plug for the charging wires and a separate 4-pin round plug for the running lights. Charge wiring coming from the alternator needs to be fully scrapped and replaced with a good 4 gauge run instead of the under-rated 8 gauge system I put in back in 2006.

4.) Front of the Camper’s tub needs to have a bolstering frame built onto it, it has always flexed and moved too much whenever the camper has been lifted for loading and unloading.

5.) The 3 year old Shurflo Extreme Smart Sensor 4.0 water pump needs to be replaced (fortunately, Shurflo replaced this as a “Good Will” warranty exchange, since I bought the pump in ‘09, but it was manufactured in 2007) as it has started leaking water around the body and is pushing pressure back towards the tank.

6.) Replace the broken down intermediate steering linkage on the truck to tighten up the steering for improved handling.


First off, the tale of how I got this pump. 

Back in late 2009, I purchased as Shurflo EXTREME Smart Sensor 4.0 water pump as a replacement for the 37 year old Shurflo that had been faithfully serving my rig. 

My main reason behind replacing the original pump (which I still carry as an emergency backup pump) was it was an old 2 gpm model and it was starting to drip a little around the pump head seal on the pump body, add in that showers were always a bit annoying to take due to the pulsing of the pump, I decided it was time to retire the dependable original for a more modern replacement with a variable speed motor to even out the water flow.

So, I bought my Smart Sensor 4.0 and used it fairly little, and within three years the pump had something fail internally and it started pressurizing the low pressure pickup line from the water tank (There’s an original backflow preventer on the tank line to protect the tank water) and leaking around the pump body.

Add on that as time progressed, I had to gradually turn up the adjustment screw till it maxed out to get the pump to continue to run smoothly when the shower was used, I decided it was time to contact Shurflo about repairing it.

When I contacted Shurflo, I reached Pedro Silva, a very helpful fellow who instructed me to remove the sticker from my Shurflo and send it in and they’d do a warranty replacement (Warranty was 3 years and I was on the outer edge of it based on when I had originally bought the pump) sending out a new Shurflo Revolution 4008 pump. 

So I sent in my sticker and Pedro received it and I discovered that the pump I had bought had been sitting on the shelf at RV Parts Outlet for at least a year, and since I was a genius and lost my receipt, I had no proof-of-purchase with the date when I originally bought it.

Figuring that Shurflo had done as best as they could, I was figuring I’d be stuck having to buy a new pump out of pocket, but Pedro told me he’d pass it up the management chain and see if he couldn’t still get a warranty unit sent out.

Whoever Pedro’s manager was, I can and still would kiss them.   Even with it technically out of warranty, they sent me a new Revolution as a goodwill replacement! 

Man, do I ever love Shurflo!  Its very very rare to see company’s still putting customer service and satisfaction first and in this case going well above and beyond the call of duty!

Pedro and your boss, if I ever meet ya’ll, I’ve got a big wet sloppy kiss saved up for both of you! Smile with tongue out


So, in a few short days, my new Shurflo Revolution arrived Smile

P1110404

Since I kept the box from my Smart Sensor 4.0, I had it handy to do a side-by-side comparison of the two units.   Size-wise, the Revolution is a far smaller pump, needing a smaller motor and valve body to produce smooth water flow and pressure comparable to the Smart Sensor. 

Add in that the Revolution uses an entirely new style of foot mount, being made entirely of rubber instead of little rubber grommets set into a steel plate like the Smart Sensor 4.0, this change in design drastically cuts down vibration noise passed from the pump through the body of the camper.


P1110401

Removal of my old pump was fairly straight forward, thought a bit more challenging as I couldn’t remove the front of the step and the fresh water tank like I did when I originally installed it. 

You can see its giant-self sitting by the sink in the picture to the left.  I ended up spilling water on myself more than once during the process of uninstalling the old pump.


P1110394

And here you can see the new far smaller Revolution 4008 installed next to my fresh water tank. 

You can see just how small this pump is in comparison to the pump that it replaced, yet it’s a vastly superior performing pump, in my opinion, than the Smart Sensor series. 


And now a demonstration on the sound quality, narrated by yours truly, “Big” Matt Smile with tongue out.


So, if you ever find yourself in need of a water pump replacement, I whole-heartedly recommend getting the Shurflo Revolution 4008, it won’t leave you wanting!

Friday, February 25, 2011

Product Review–Torklift Wobbl-Stopprs

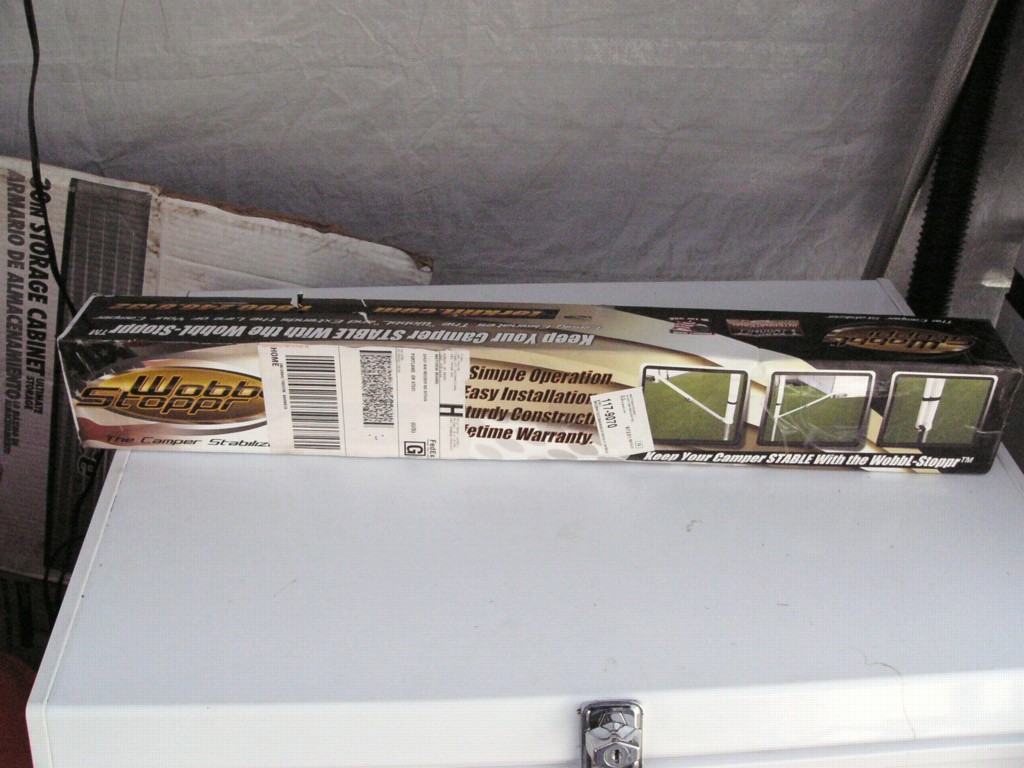
Looks like its time for another product review, courtesy of Torklift International! The last product review I did involved the rather nice tank deodorant, Odor-Eze. This time around, I lucked out in getting a new product that Torklift has out on the market now, Wobbl-Stopprs.

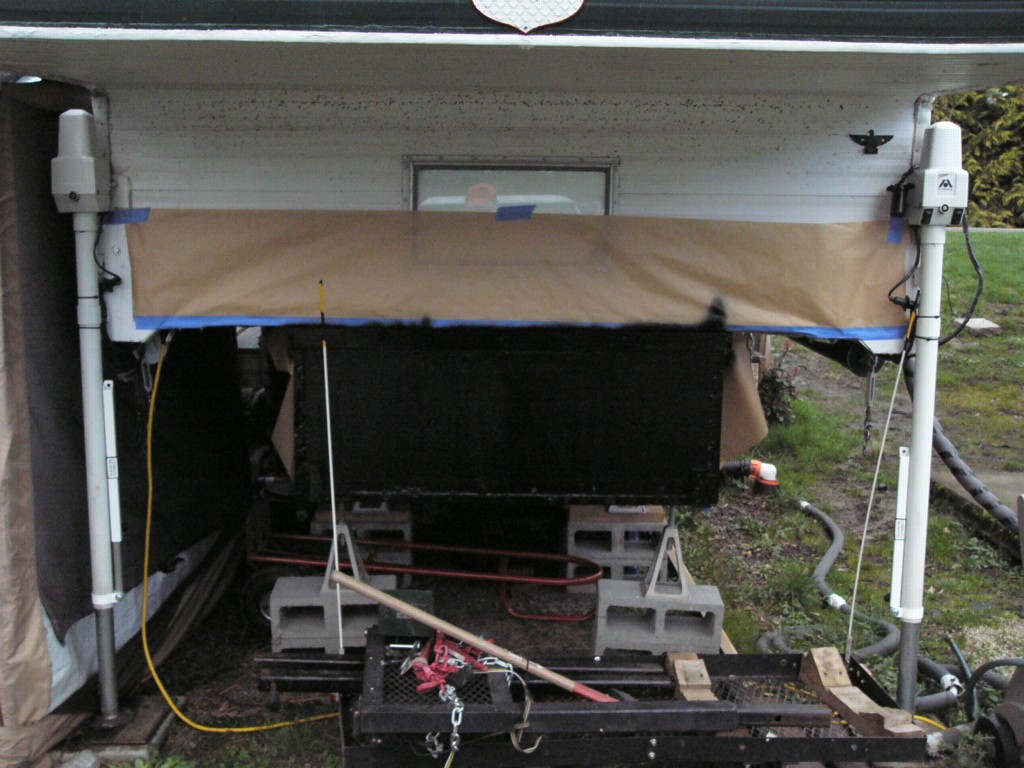
The concept behind it is fairly straight forward. On your average longer camper with a full rear-end enclosure, the rear jacks are attached roughly along their full length to the camper itself. On the front, however, your jacks are only attached roughly at the top most end, allow the camper’s weight to leverage against the jacks far more easily and subsequently inducing sway when you’re in your camper while its offloaded from the truck.

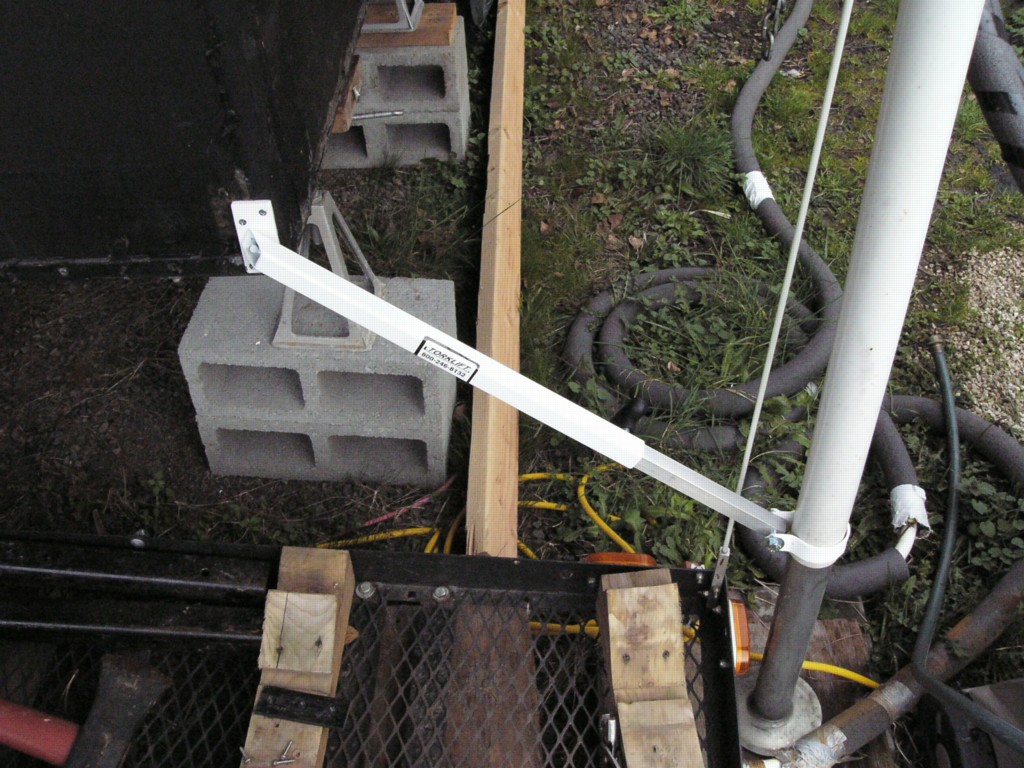
Wobbl-Stopprs work my giving you a removable stabilizer arm that connects from the bottom of the jack’s outer tube, much like when its attached along its length on the rear of the camper, to the bottom corner of the camper’s “tub” (the portion that normally sits in the bed of your truck).

By bracing the camper’s front legs at an approximately 45 degree angle to the camper’s the tub, the front legs are now prevented from flexing against their corner mounts as the energy from the sway is transferred into the tub of the camper. Unless you camp with your camper raised four feet in the air, 90% of the sway or “wobble” that people feel when their camper is off their truck will be eliminated by a single pair of the Wobbl-Stopprs.


A great many home solutions have been attempted for this problem over the years, I use one myself, three pairs of stackable stabilizer jacks that are snugged in place between the tub of the camper and the ground. While they help remove some of the sway, the sway is still present as the jack stands are not rigid creatures, and cannot hope to be wide enough to remove their own natural tendency to wiggle side to side.

Being that I’ve always approached the vast majority of RV accessories with a varying degree of skepticism, I looked forward to giving this new accessory the full-timer torture. If anything could help improve the stability of my camper when offloaded, I thought this might be it.

INSTALLATION

My package arrived, neat and tidy, quick as lightning from FedEx, one of the few deliveries I’ve actually got delivered straight to my site at Island Cove Park. Most times, things never get delivered any further than the local Post Office, even if it was sent via UPS or FedEx, which means the actual date of delivery isn’t always what’s promised on the package tracking.

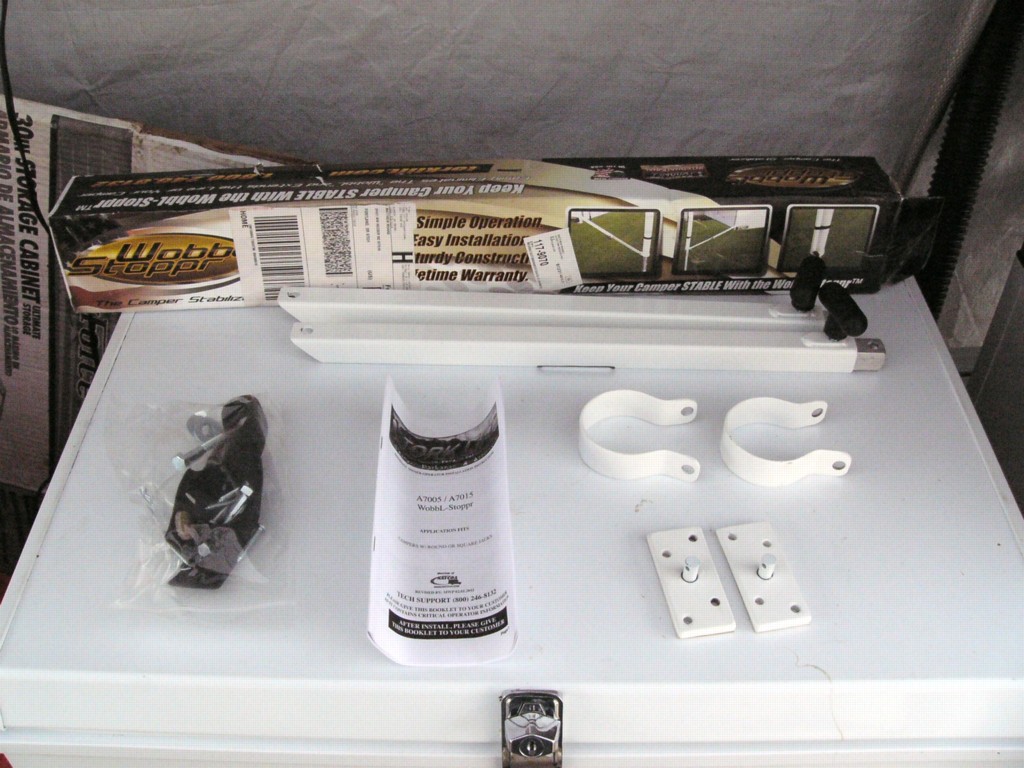
Unpacked my box and sorted out and counted the parts to make certain everything was in order, so far it looks pretty straight forward and simple to install.

The installation instructions for the round tubed jacks left a bit to be desired, the pictures for the round jack assembly weren’t as informative as those for the square jacks, the worded instructions were more useful, but still not as complete as they could have been.

In any event, the assembly of the Wobbl-Stopprs isn’t rocket science, so with a little ingenuity, I figured it out easily enough.

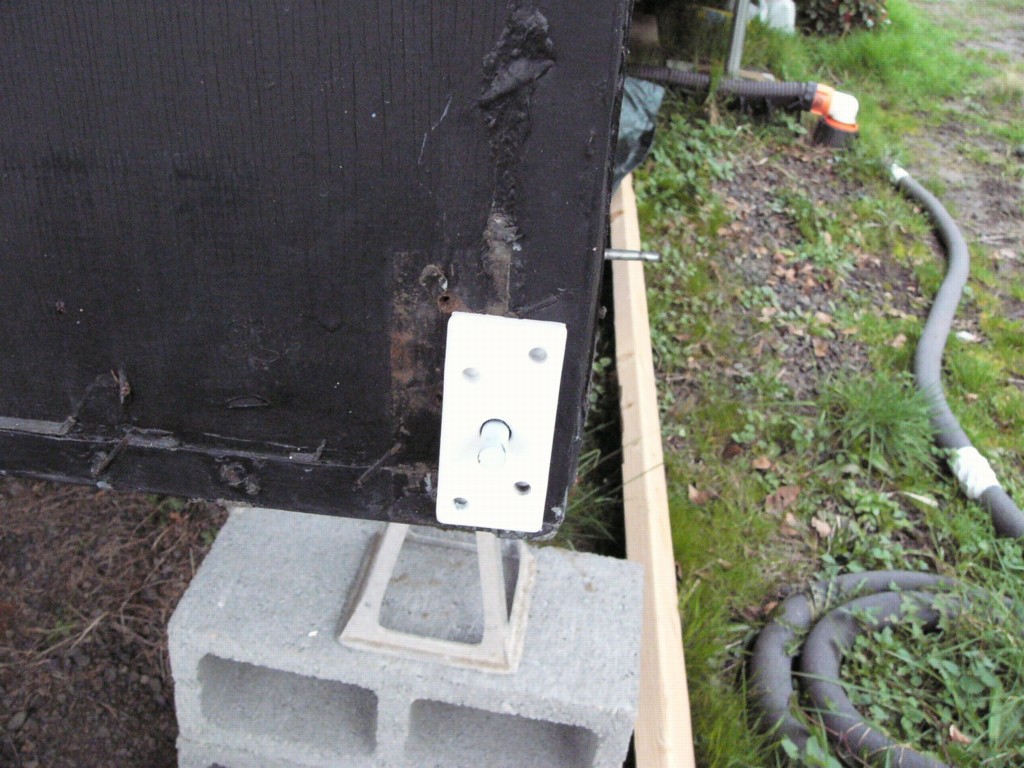
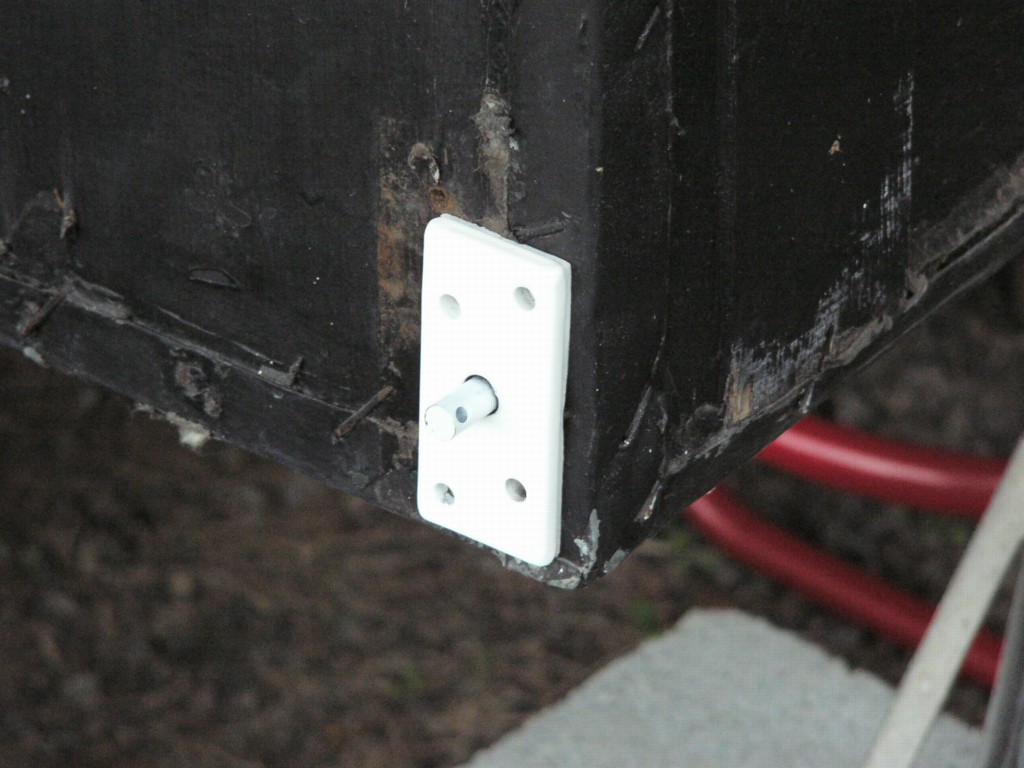
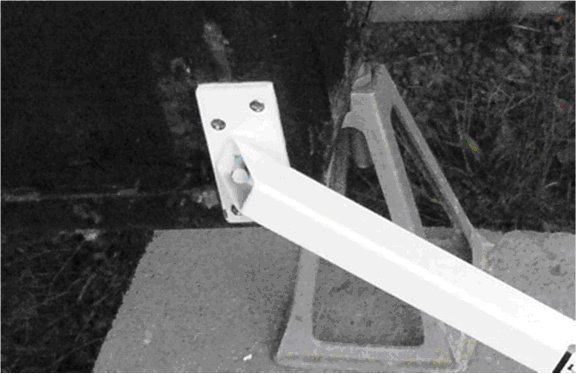
First off, I installed the attachment plates to the camper, first temporarily with the stick on backing tape that is supplied already attached to each of the back plates, (simply peel and stick!) then I secured it in place using several tapered head screws. The original screws that came with were a little long for the frame of my nearly 40 year old camper, and were the round headed variety, which to me seemed odd given the nice taper edged holes that were in the brackets, so I used a similar diameter, cone headed screw that was a little shorter to keep the screw heads from poking through the frame of the camper. These snugged up nice and flush and tight with the brackets.

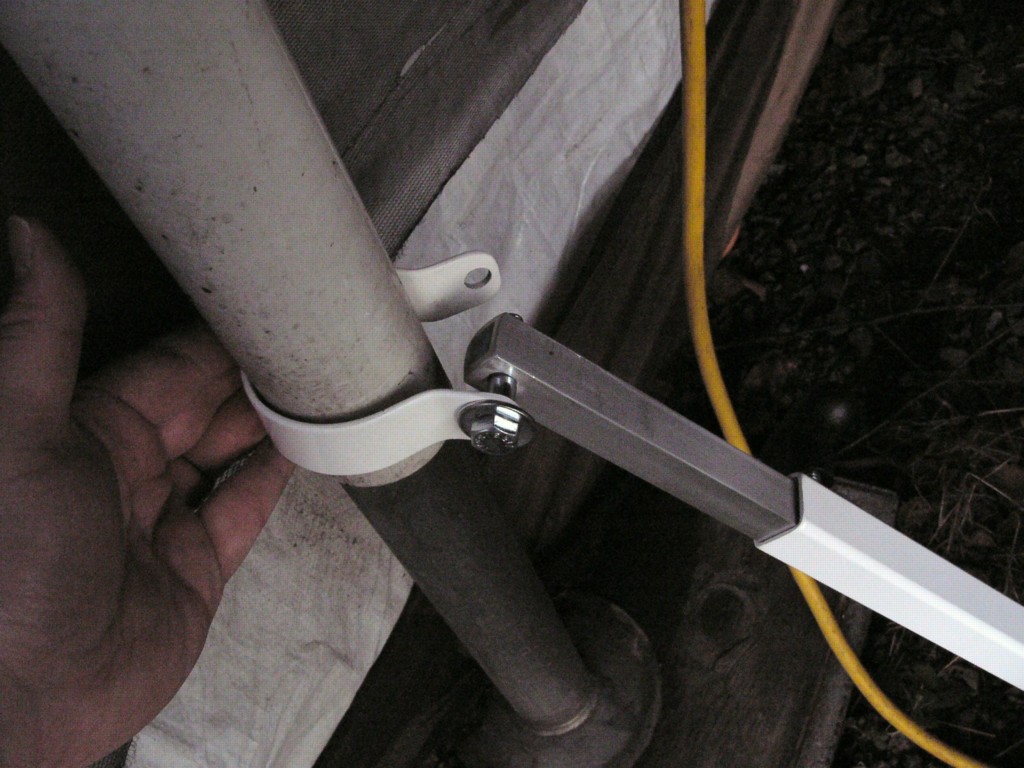
After installing the front mounting plates, I proceeded next to installing the arms and the clamp rings to the camper jacks.

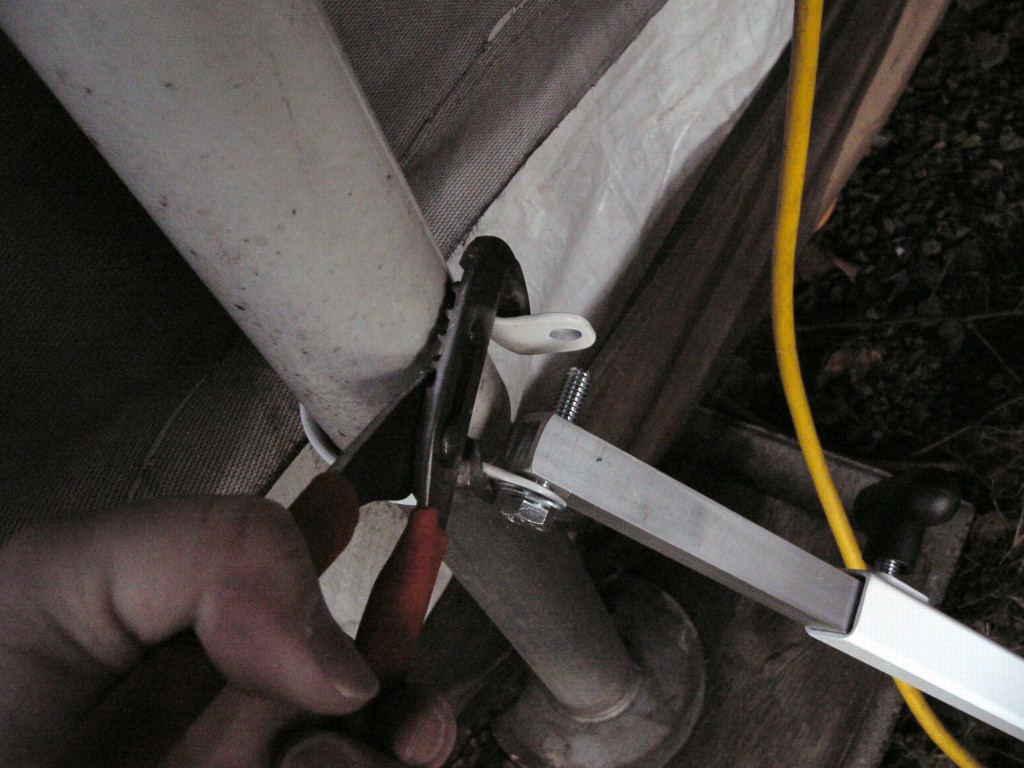
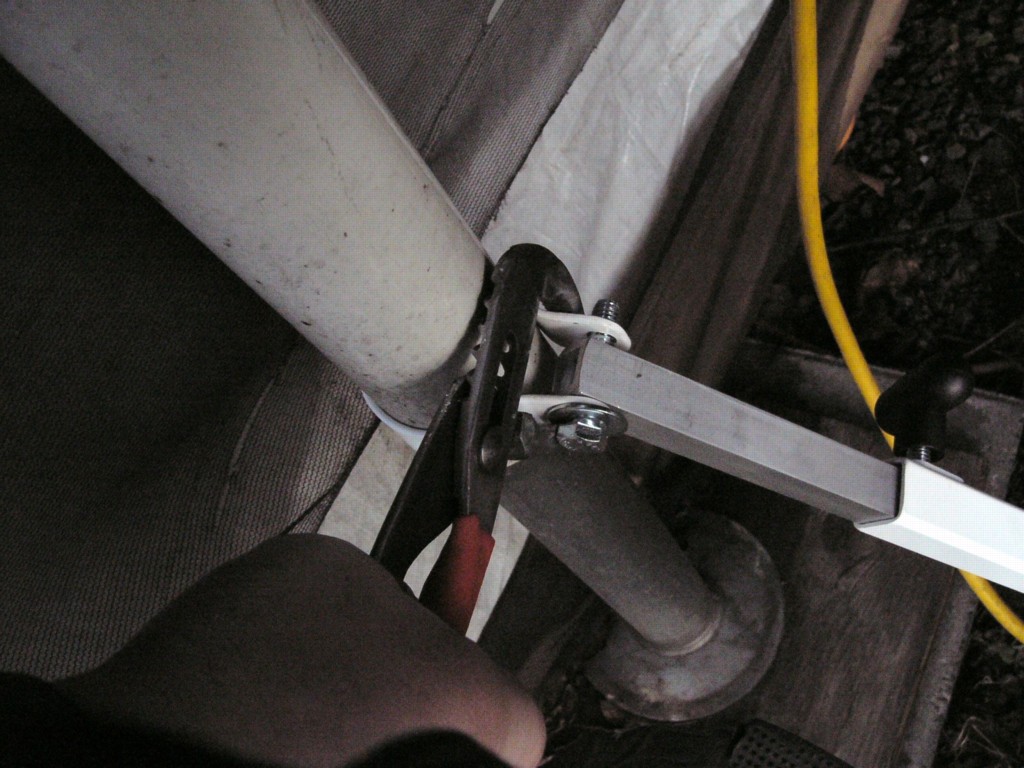
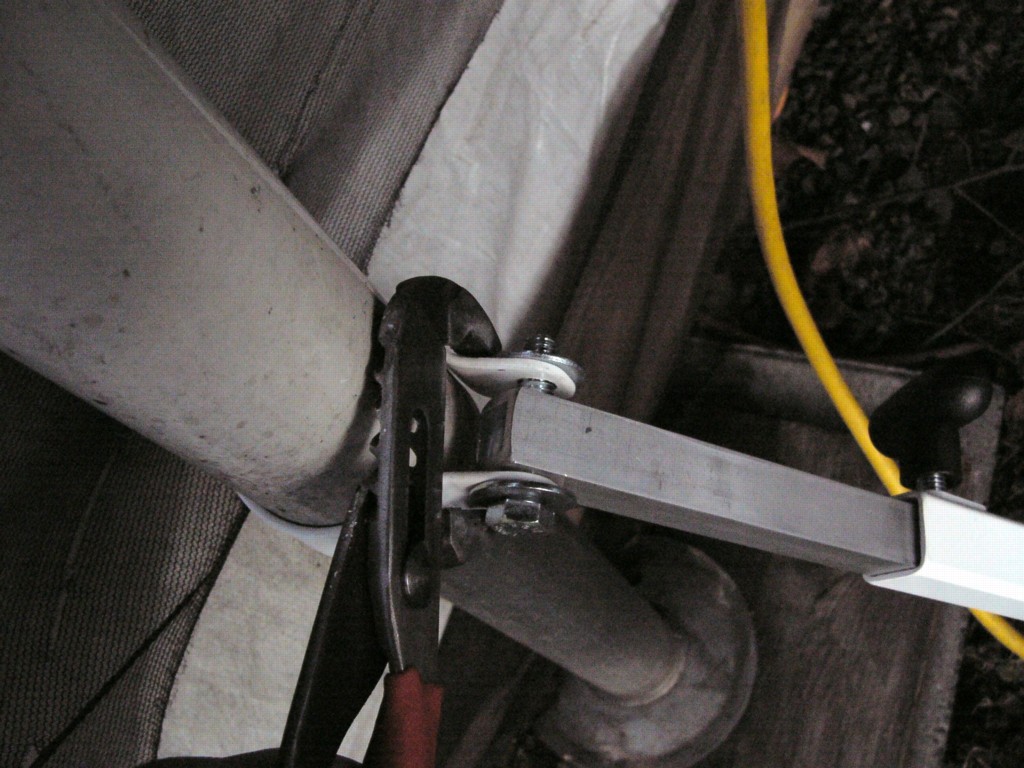
The rings slide around the leg easy enough, I used a pair of decent sized channel lock pliers to squeeze the ring down the first time to slide it over the bolt, then once more after installing the washer to provide enough thread to tighten the nut on by hand for final adjustment before snugging everything down in its final position.

If one is worried about the finish on the rings, you can prevent damage to the finish by first wrapping the jaws of the channel lock pliers with masking tape.

Once the arms were loosely secured to the legs of the camper, I loosed the securing nuts on the arms and slid them up and onto the pins on the attachment plates that I earlier secured to the tub of the camper.

I then pinned them into place using the clips that came with the kit and adjusted the clamp rings until the clamp rings were square to the brace arms, then using a 9/16” box-end wrench and a 9/16” deep socket wrench to snug the clamp ring down till it was lightly snug against the arms so that they don’t drop down later on when the Velcro straps are removed.

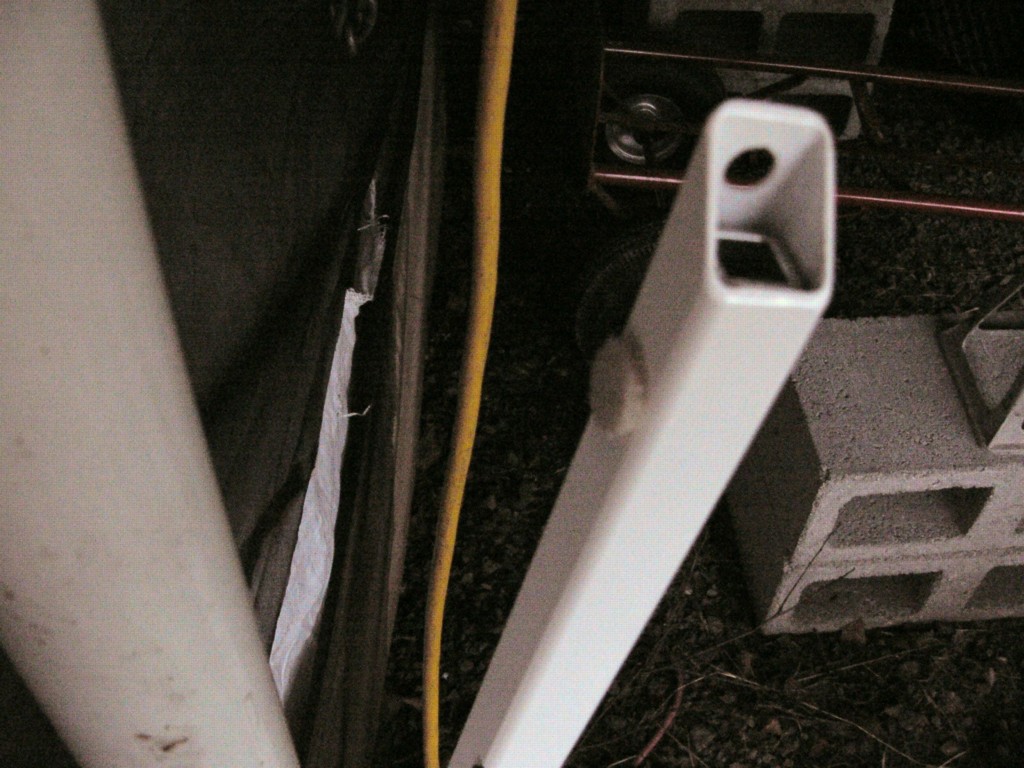
Once the arms were both aligned, and the clamp rings snugged down, I installed the felt pads on the arms:

Then the Velcro Straps:

Quick coat of paint to the front of the tub of the camper to touch up the scuff guards/spacers and to blend the attachment plates to the front of the camper:

And the Wobbl-Stopprs are installed!

After the paint had dried and the arms were securely in place, I gave the camper its standard shake test. Normally the camper tends to wiggle side-to-side rather easily either from the wind striking the camper broadsides or from movement of occupants.

REVIEW

After installing the Wobbl-Stopprs the camper has now become as solid as if it’s tub was sitting directly on the ground. I can give the edge of the cabover a decent shove and the camper will hardly move at all, given that prior to the install, the camper could easily wiggle 2-3 inches side-to-side with only a moderate push.

That same evening it got its first weather test. In the past when a good gust of wind broad-sided the camper, it would be brought straight to your attention, either by stirring you fully awake from a sound sleep or startling you by the camper wiggling. This time around, the only reason I even noticed that it was gusting was the sound of the screen room next to the camper moving as it normally does and the flap on the range hood making noise in the breeze.

Over the past couple weeks of use since I originally installed the Wobbl-Stopprs, my quality of sleep has improved in the camper (I’m a fulltimer and live in my camper year round) as I’m no longer stirred out of a sound sleep by rolling over in bed and the camper wiggling side to side.

Saturday, January 22, 2011

A better way to blog

Well, I’ve been wanting an offline blog editor for quite sometime, and hadn’t really seen anything out from Google, owners of Blogger.com, that fit the bill.

Then, I found Microsoft’s Live Writer.

This free utility is part of the Live Essentials library of tools that Microsoft has out on the net for free. It works seamlessly with just about every major blogging website out there, including blogger.

This entry, for example, was written with Live Writer.

I’ve discovered thanks to its layout system that I can write journal entries 4x as faster than I was before using Blogger’s online editor. Case in point, I just posted a four part trip entry about the Mt. Hood Railroad in the time it normally takes me to write up entry using the on-page editor.

The blog entry looks like its finished product as you compose it.

Plus it has one thing I’ve always been after, an offline editor. It caches everything from your blog and any pictures you’ve linked locally so that you can continue to compose even when the Wi-Fi is not working.

One button publishing to effortlessly post your newest work to your blog.

So, my fellow bloggers, I humbly recommend trying out this free tool. It may take a little getting used to, but the learning curve is low and once you experience it, you won’t want to to blog via browser again.

Wednesday, December 8, 2010

Product Review - Chempace's ODOR-EZE

For those of us that are users of RVs, one of the common hassles we face is tank treatment chemicals for our Black Tanks.

Most of us, myself included, usually tend to get whatever's cheapest off the shelf at Wal-Mart or whatever the smarmy salesman at the Dealership or Camping World can pawn off on us for a rather inflated markup.

For me, I've been using Thetford's Campa Chem Liquid (6 pack of 8oz bottles) for the past several years.

Mostly I use it when my camper's docked in its stationary position, so the 30-odd gallon holding tank is doing black tank duty solely. It takes roughly a month for me to fill a 30 gallon tank using just the toilet.

30 days of fermenting black tank contents is not a pleasant smell, even less so when the toilet is mostly used as a urinal.

This is not a smell one normally wants to be trapped in the bathroom with while showering. For me, I've discovered that placing my foot on top of the toilet flexes the plastic seams just enough for the fantastic fan to draw a little taste of the black tank's bouquet into the shower while I'm washing.

In the winter, this isn't that bad, in the summer, you can't add enough campachem to the holding tank to kill that smell off.

It wasn't until I attend the Fall Colors Rally and attended Torklift Rob's product demonstration table that I found this neat little product.


Chempace "ODOR-EZE"


At the time I kind of gave it the non-committal grunt that for me usually means, "I'll believe it when I see it" and took a bottle home with me.

It wasn't until a few weeks later after the camper had been unloaded and tucked it back into its site for the winter that that wonderful holding tank bouquet revisited me and I remembered the little bottle of tank treatment I had brought back from the rally.

Figuring that I'd have about as much luck as my experiment with treating the holding tank using Pinesol (Which worked great till the urine overpowered the Pinesol and I ended up with a worse stench than before) I added the bottle to the half full tank and let it do its thing.

After the first day, I noted the tank was stinking a little less and figured that was about the extent of the chemicals abilities.

A few more days after that I noticed the tank had stopped smelling altogether. At last, blissful relief I can shower again without stinking myself out!

This product actually worked vastly better than the CampaChem, in that it actually eliminated the urine odor, something the CampaChem mostly just tried to mask.

Now, here's some other neat things I've discovered about Odor-Eze, unlike CampChem, it uses no Formaldehyde, so its good to use in California, and parks where traditional tank treatment chemicals may be banned.

So far, I've found two online RV Supply store that sells the Odor-Eze/Chempace product line, http://www.rvupgrades.com and http://www.rvingoutpost.com/ (Thanks Julie!).


Chempace ODOR-EZE

Gallon/Half Gallon Size


AdventureRV, Tweetys, and Camping World do not carry the Chempace product lines. I will update this post if and when I find new online stores that sell the Odor-Eze product line.

You can also find Odor-Eze at these fine local dealers!

R'n R RV - Spokane, WA
RV's NW - Spokane, WA
Torklift RV - Kent, WA
Coumbs RV - Olympia
Broadmoor - Richland, WA
Bretz RV - Missoula, MT
Blue Dog - Hayden, ID
Blue Crick - Airway Heights, WA
Longview RV - Longview, WA
B. Young RV - Milwaukie, OR
Wager's Trailer - Salem, OR
Johnson RV - Sandy, Or
Allied RV - Sacramento, CA
Guaranty RV - Junction City, OR
Nelson's - Boise, ID
Thunder RV - La Grand, OR
Island City - Island City, OR
Western Rec. - Prineville, OR
Jerry's RV - Bend, OR