


For a while I had asked about mounting fans to the cooling fins in an ammonia absorption fridge to help with air circulation. Thanks to a lot of people I got great advice on adding a "Draft Induction" system to my fridge in addition to my interior fans as well as a tip on relocating the thermostat wires to allow the fridge to run colder than it normally would have. The combination of all three helped my 32 year old G.E. Fridge quite a bit.
The interior fans helped to make it so that the fridge is now equally cold, stuff on the door stays cold as well as stuff in the back of the fridge.
The exterior fans helped move the hot air that would stagnate in the exhaust stack in the back of the fridge, which reduced its cooling capacity.
My fridge now stays icy cold even in direct sunlight on the camper and when the interior of the camper is 90+ degrees, the fridge stays down where it should be.
Now, onto the project, as always, click on any of the pictures for a larger view.
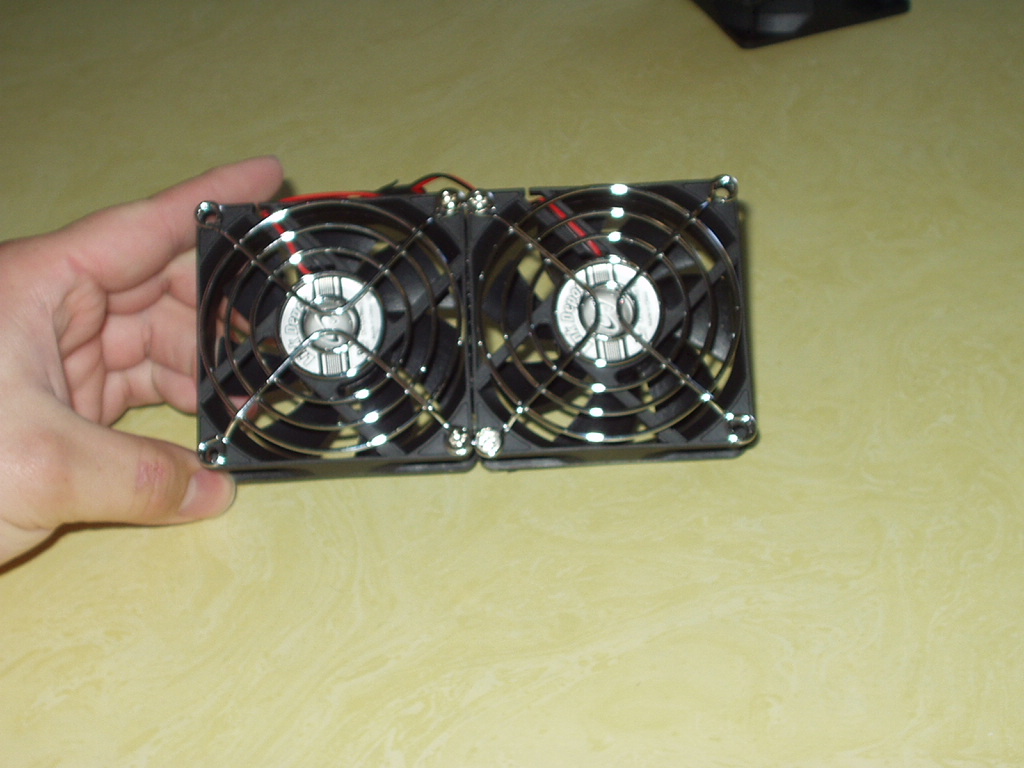
For my project, I decided I would need about 4 fans for the combination of the interior and exterior. So, I went to our local Fry's electronics here in oregon and picked up a 4 pack of 80mm x 80mm Case fans for $15.
These fans each move about 6 CFM of air, but only draw 0.16 amps of 12 volt power. The combination of all 4 running all the time consumes ~15AH's a day, if my math is remotely accurate (0.16 amps x 4 fans = 0.64 amps drawn x 24 hrs = 15.36 AH), so for my average 4 day camping trip that would burn around 60 AH's of battery, right now, I have 1 group 27 Battery that has show amazing vitality in that it ran my camper with 2 people and showering daily and cooking and doing dishes and lights for 4 days without being run down. I will be adding a second bank of batteries to the camper here in the near future to add additional capacity (2 Trojan SCS225 Batteries @ 130 AH each).
I also picked up a 2 pack of grates for the interior fans to keep food packages from getting stuck into the fan blades by accident. To simplify installation, I glued the two interior fans together and then attached the covers with the screws they came with in the center bolt holes. The outer holes will be used to secure the fans to the fridge fins.

To secure the fans in place I super glued 4 nuts to the correct spots on the fins. I used a fairly small nut and screw combo so that I wasn't attaching a large chunk of metal to the thinest part of the fins. I routed the wire for the 12 volt supply through the existing access hole in the back where the thermostat wires came through. I used fully insulated blade connectors to connect the fan to the wiring, so that if I needed to remove the fans for cleaning, I could completely unattach them and take them out of the fridge.
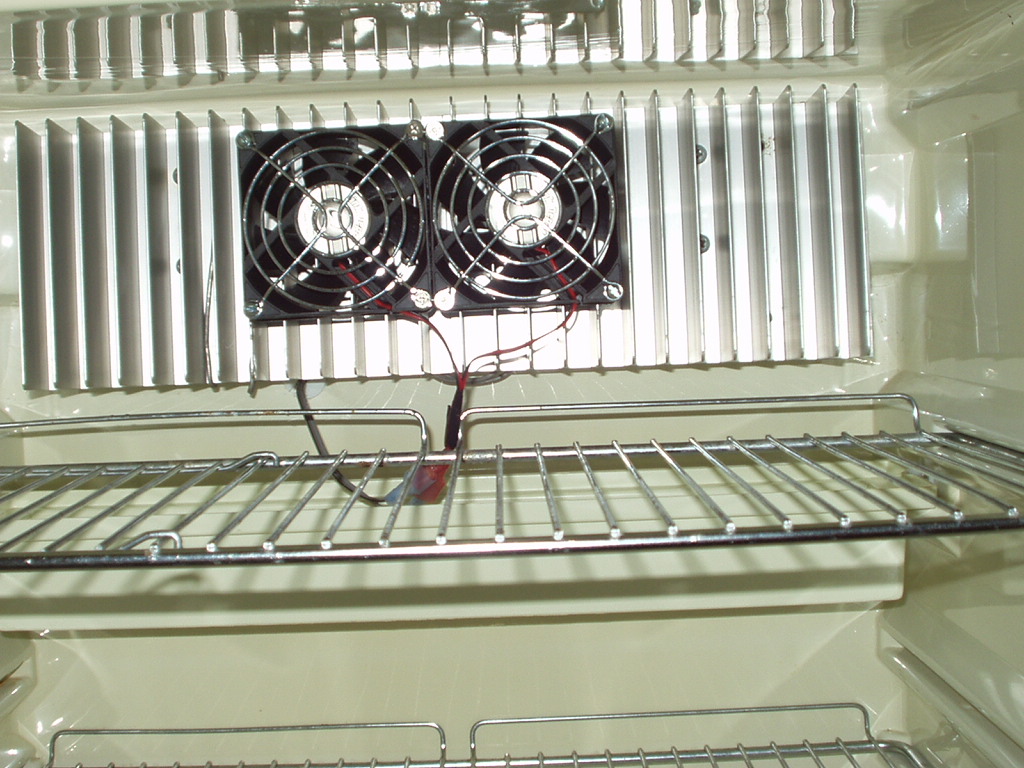
The fans are now in place, secured firmly by the four small nuts you saw in the previous picture. They're centered in the fins as the right side tends to get coldest first and also the milk spot on the shelf is just to the left of the left fan, so the positioning was perfect to prevent blockage of air flow.
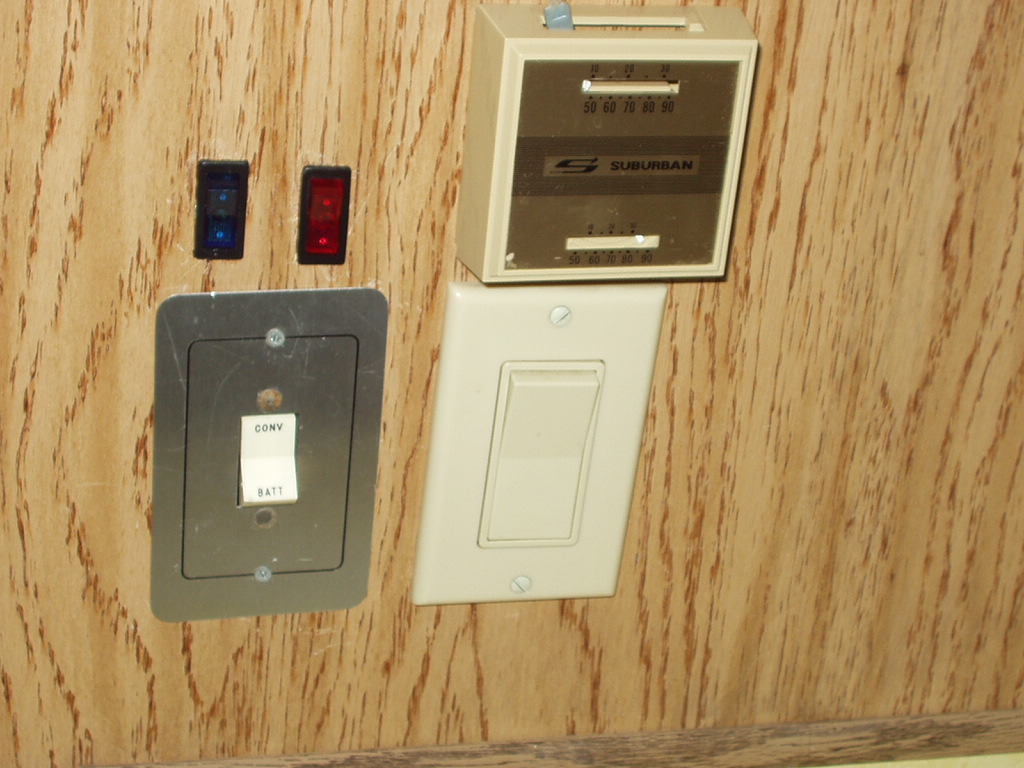
For the exterior and interior fans, I installed 2 LED illuminated toggle switches I picked up from Bi-Mart for $1.99 each, rated for 20amps. I chose two different colors for the different fan banks, blue interior (Cold Air Fans), red exterior (Hot Air Fans).
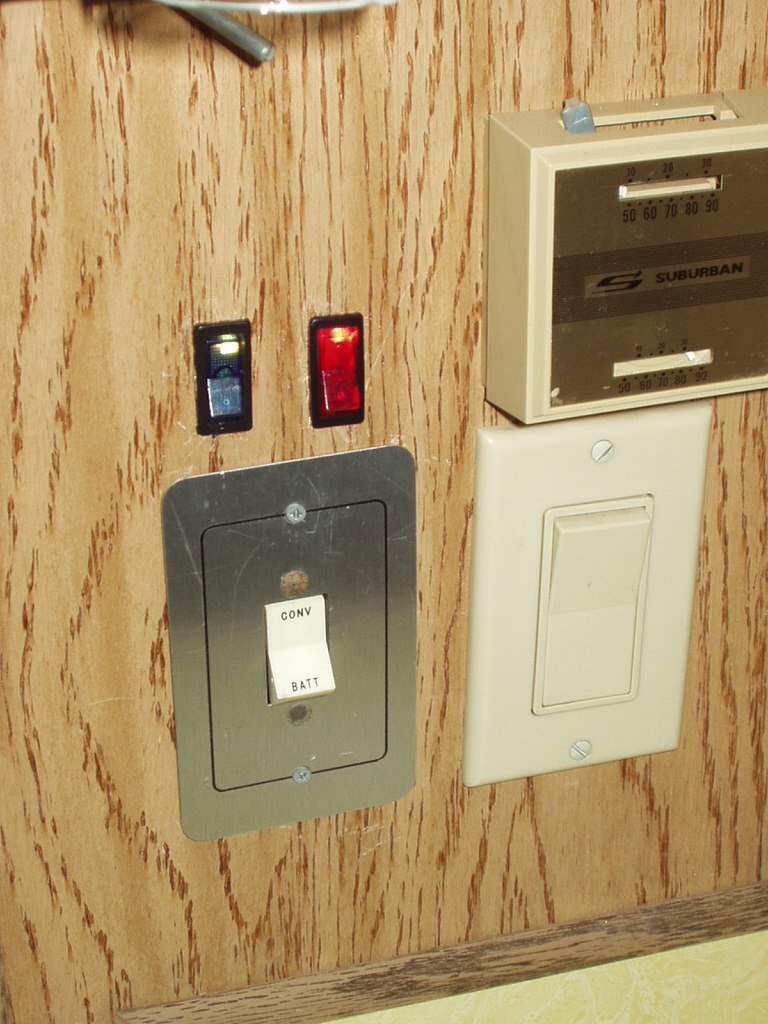
These switches are all in the right hand side of the fridge, so the wiring was short, as just below the fridge is the fuse block and I just tied into an existing 20 amp fuse.
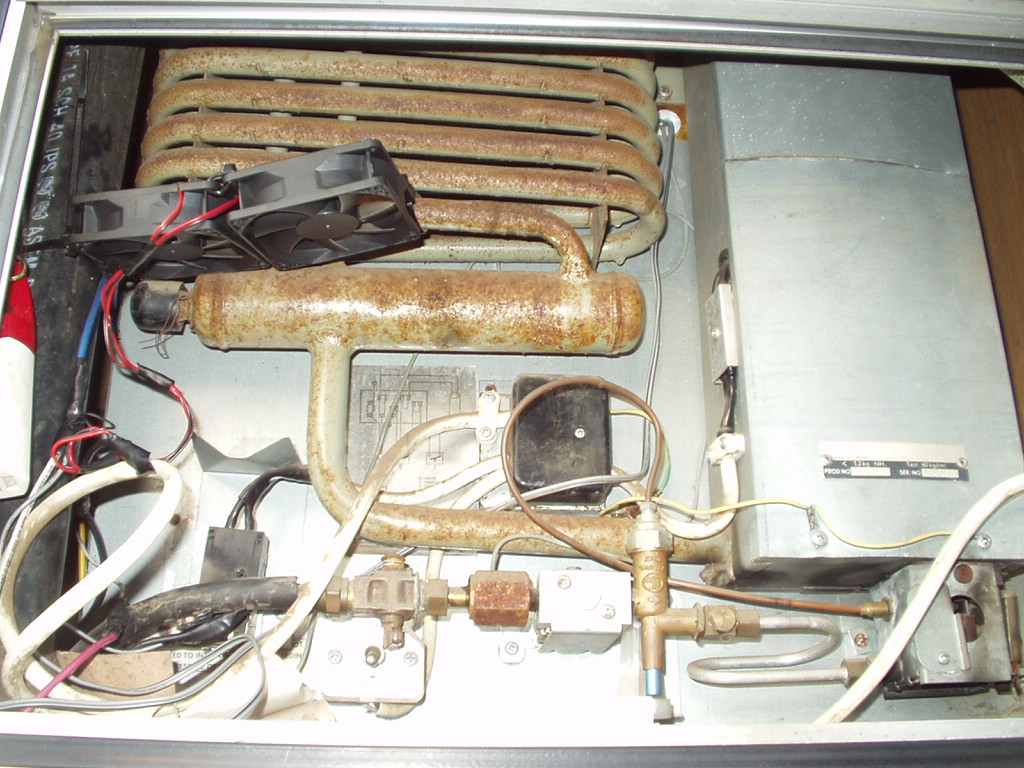
My exterior cooling fans WERE mounted between the door and the coils so they pull air in through the louvers and blow it up over the coils and through the top. Not the most perfect looking setup, but then it was a PITA to get those to balance in place while snugging the zip ties, however, after getting somewhat worried about the straps wearing on the coils, I relocated them to the door itself, so they lift up out of the way when you open the access door, and drop right back into the best spot when closed. They no longer are in direct contact with the coils, and seem to be doing a better job where they are now, than where I had them before. I just haven't gotten around to taking a newer photo.
All in All, the project probably cost about $23 to add a good system of air discharge both hot and cold. At some point, I may add a third fan to the interior block on the right, but for now the 2 in the center work great and I still have room to put taller containers around the fans without blocking any.
Come back Again for Project #4, Insulating the Cab-Over Floor
Hi im busy doing a similar modification to my Dometic RC2200 absorption cooler. It's performance starts to deteriorate quickly when the outside temp rises above 35'c . Im installing 3x 80x80 12v fans on the hot side and iv got a small 12v blower that will circulate the cold air on the inside . Im planning on powering this off a 12v sealed lead acid battery of around 7ah capacity. I'll be using this setup when I camp out in the bush away from electricity so I'll be using a 10w solar panel and controller to replenish the battery.
ReplyDeleteThanks for the post on cooling fans. I have read your whole post and I really liked it. Great Work!!
ReplyDeleteNice I also share with you something hope this helpful for you my friends Window fans use little energy and can provide effective cooling in many climates. Window fans are best used in windows facing away from the prevailing wind and exhausting hot air from your home. To cool as much of your home as possible, tightly close windows near the fan and open windows in rooms far from the fan, preferably on the windward side of your home. Windows near cooler, shaded outdoor areas provide the best intake air. In multi-level houses, the fan should be located on the upper level, if possible, and the open windows should be located on a lower level. If that's not practical, you may want to independently ventilate each level of your home with separate fans.. Check it out thanks.
ReplyDeletewindow fan
The preferred temperature is somewhere between 35 and 38 degrees F (1.7 to 3.3 degrees C).
ReplyDeleteCheap Radiators & Radiator Fans