


-------
Now, this topic has come up more than once over the years on this forum. Most folks either opt for power extension mirrors, or the more common slip on varieties.
These all work great if you're using a stock mirror setup, or your truck has a set of electric extendable mirrors available for it.
Now, what does one do when your truck no longer has its stock mirrors and instead has a big old honking set of dump-truck mirrors?
Easy, you add on!

These mirror extension brackets are another design that my buddy Terry and I dreamnt up after I got to complaining about the fact that I couldn't see all the way back to the rear of my truck or who the hell was getting ready to play Johnny Rocket and shoot out from behind me to do a jacktard passing maneuver.
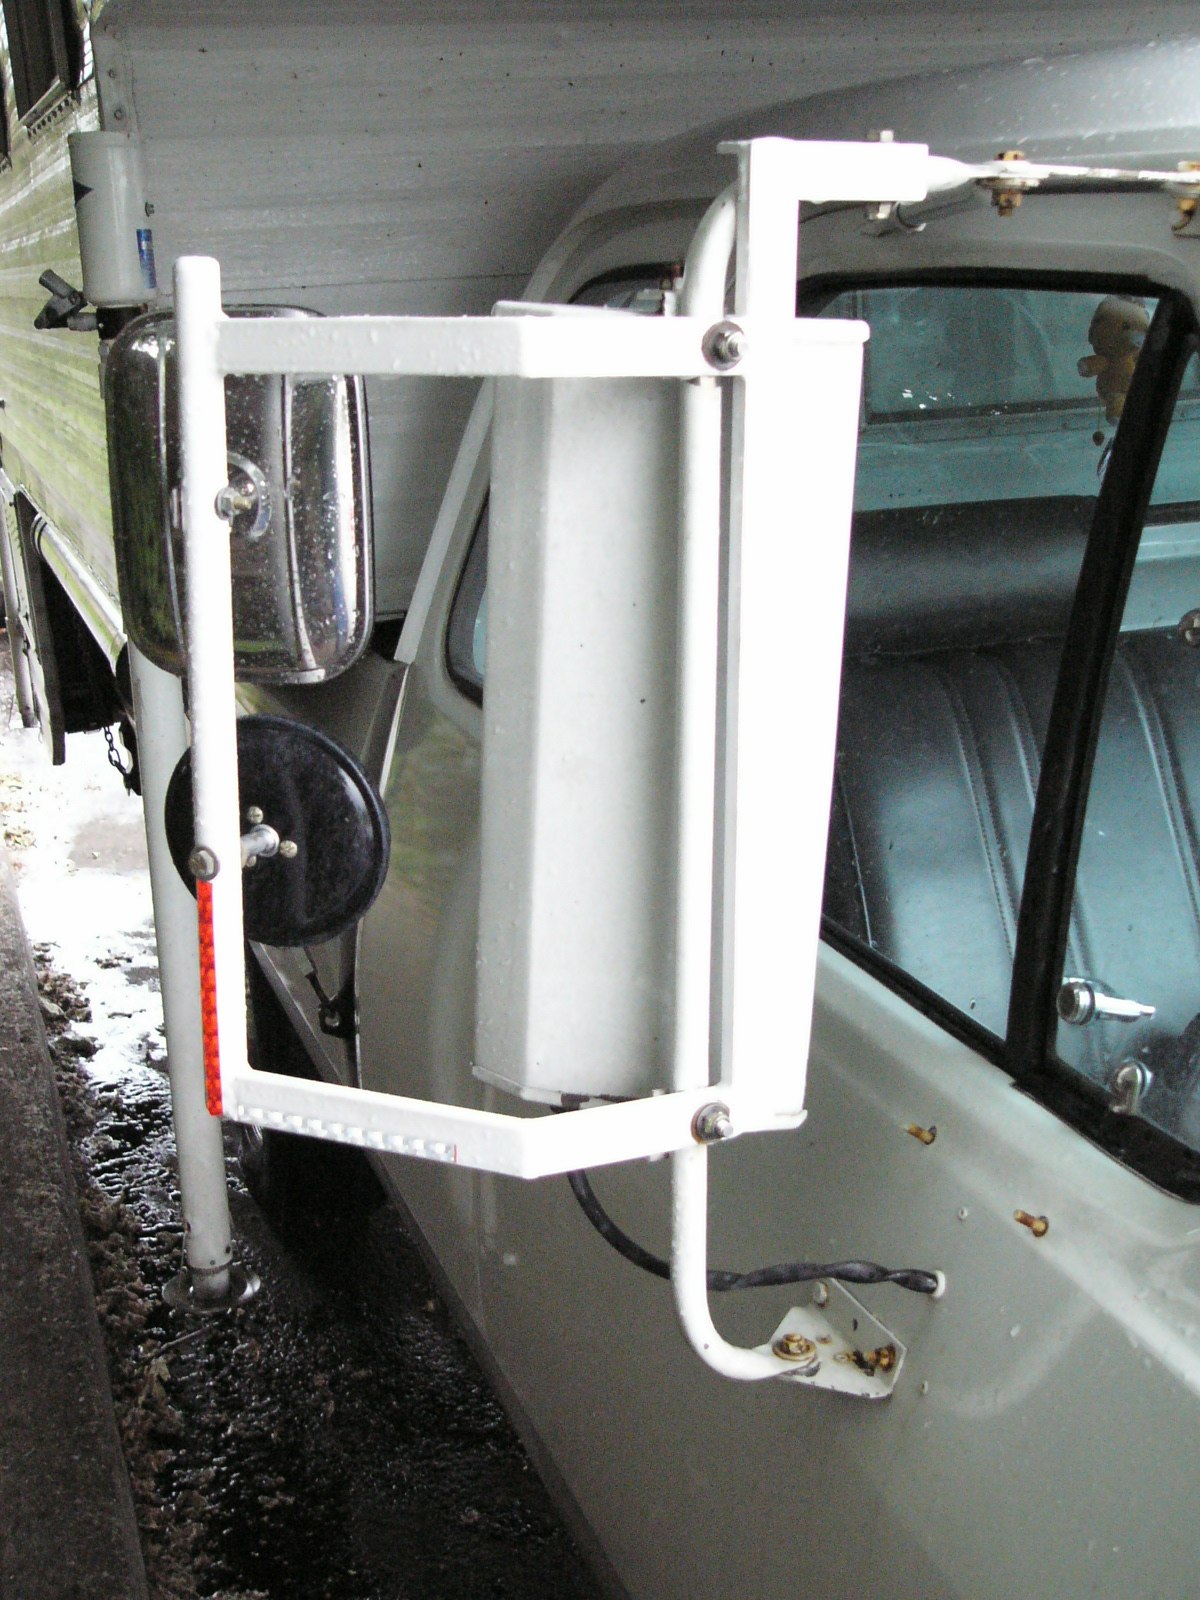
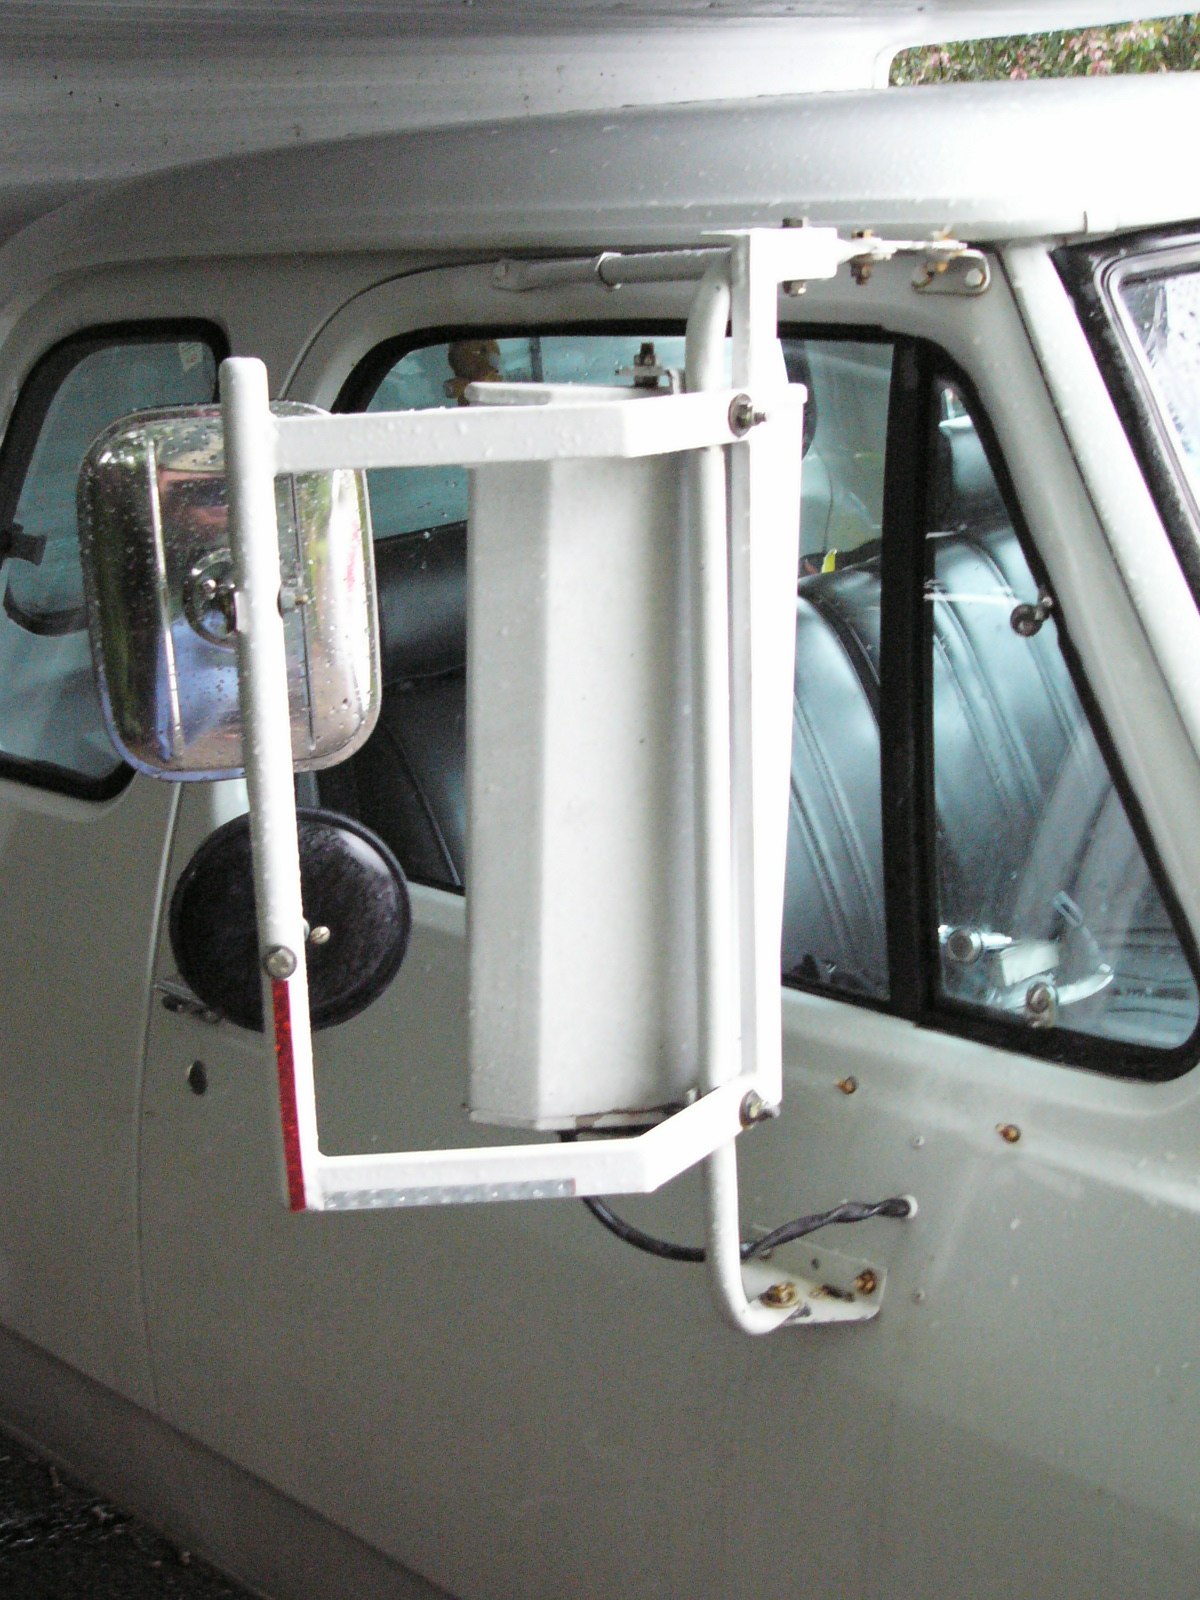
Rather than drill a whole heap of new holes in the existing mirror brackets, the design opted for reusing the existing mounting stucture and only drilling a single hole in the top cross member to give the mirrors lateral stability. All other holes were matched and the only changes made were the addition of longer bolts to accomodate the extra thickness of the extension brackets.
The extensions are removable, though they require a socket and a wrench to do the job instead of simply undoing some straps or pushing your mirrors back in.
The advantage I like about the design is the two seperate mirrors on each bracket in addition to the stock mirror and the convex mirror attached to it.
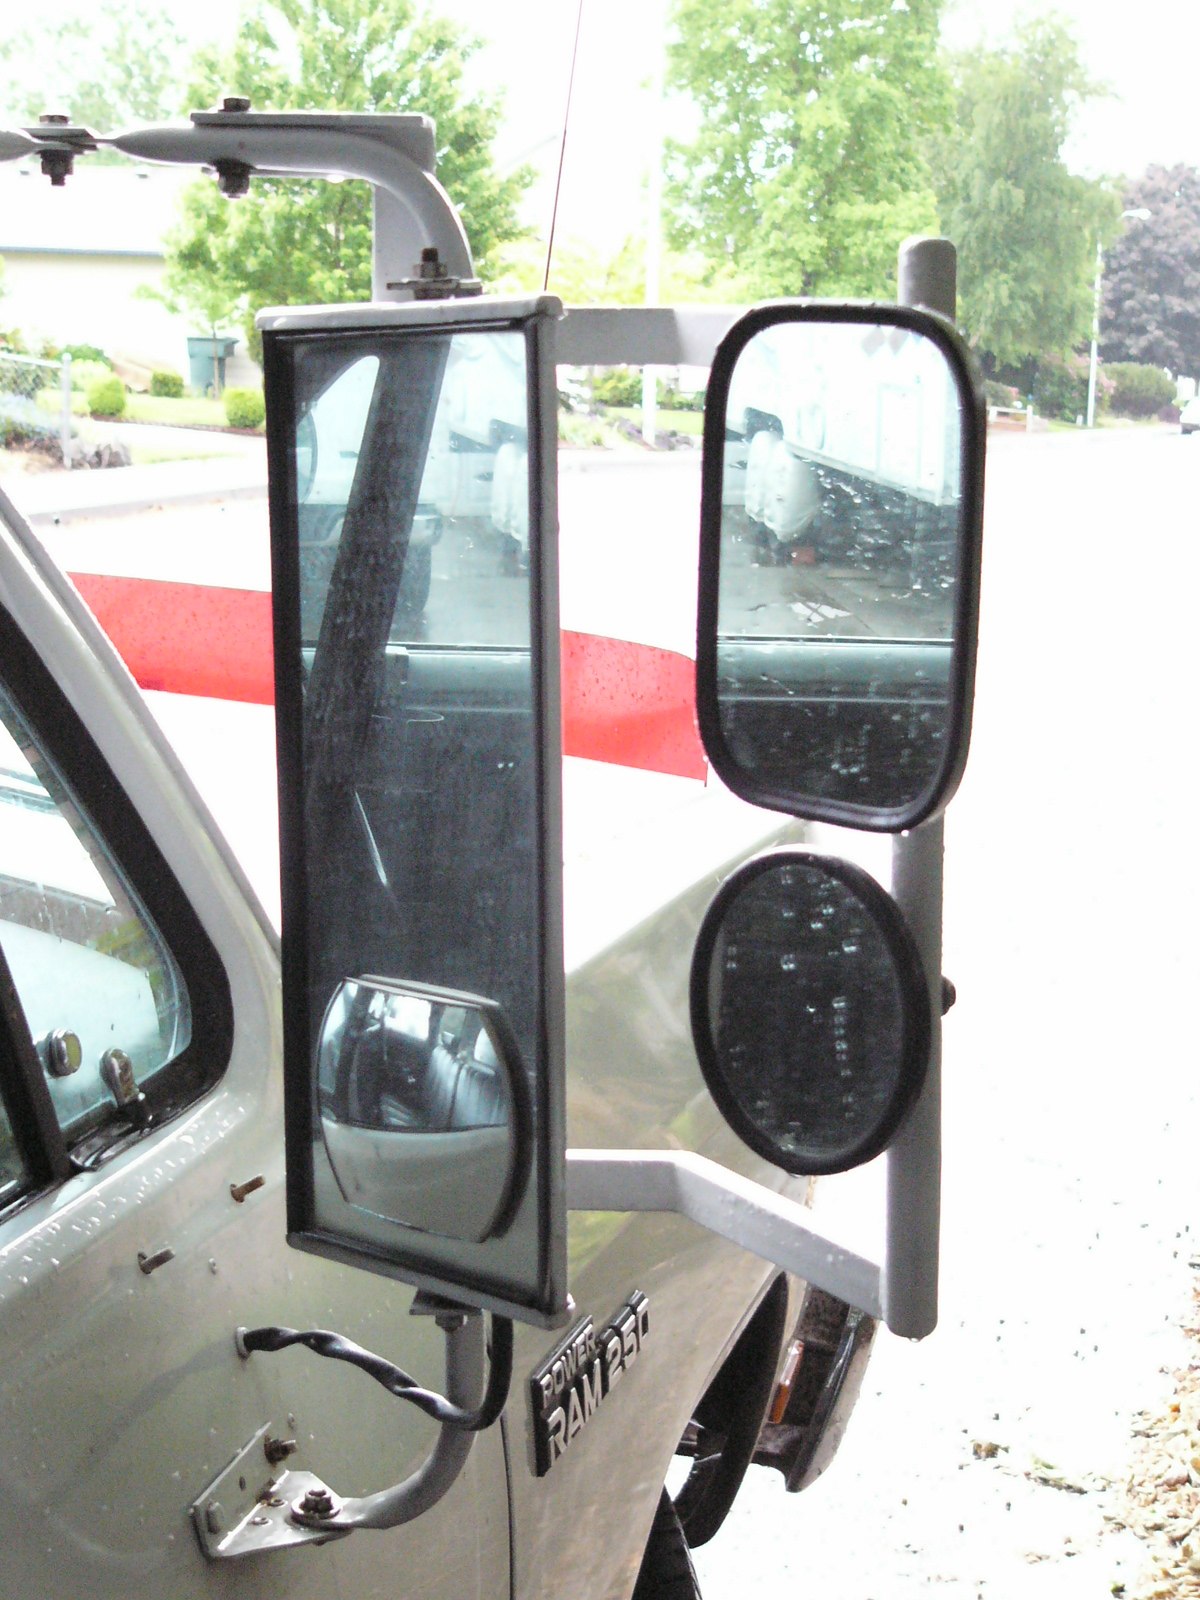
The Upper mirrors are perfect for showing me whose hanging around behind me and what's coming up behind me and along side me up to two lanes over.
The lower mirror allows me to watch the back corners of the camper as I clear corners and tight clearances, as well as watching trailers to make certain that I do not jackknife them when backing up, or cut a corner too close and catch the trailers axle in a curb, pothole, or someone elses car.
With this setup, I can now see just about everything behind me from all different angles, with sufficient overlap to eliminate any blind spots I had in the past.
This is, perhaps, one of the better project investments I've made in my time as a Camper owner. Compared to the slide-on mirror extensions my parent's use with their Toyhauler, my field of rear vision is almost four times that.
Hey Big Matt,
ReplyDeleteI am inheriting a circa late 60's early 70's Del-Rey camper (not sure the model but looks like one you have in your blog). It needs some work and specifically there's some damage on the flooring near just inside the door entrance. How difficult is it to peel back the sheet metal and replace flooring? Have you ever had to do this? It's something I'd like to revive rather than get rid of as I have very fond memories of camping when I was young with my brothers/parents and would love to do the same with my own family now.
Brgds
De-skining an older camper isn't difficult, however, it does require patience and an extra person or two to prevent the sections from being damaged.
DeleteMost interlocking siding uses S-Seam joints to prevent water entry, you simply need to carefully remove the stapes hidden under the trim strips (which you'll also need patience and careful hands to remove if you wish to remove it) and along the edge and then pop each section loose from the other.
Depending on the unit, you'll want to start likely from the top and go down, but check before you start pulling pieces.
On the floor, depending on how far gone it is, if you properly brace the camper under the wings and frame, you can technically drop the entire floor out of the unit and rebuild it from scratch and reinstall the whole new floor.