Sunday, March 25, 2007

When ya thought you knew the depths of Redneck Engineering.....

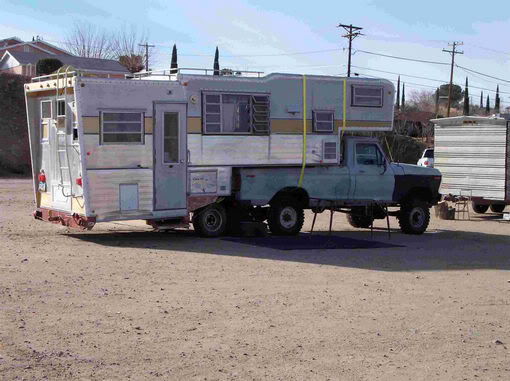
A while back, one of my fellow camping enthusiasts, luv2skyski, found an rather interesting little picture of a custom engineered extra long Truck Camper.

I've seen tag axle campers before with Born Free's 14' beauty, but this is kind of going a tad too far.....


As best as I can tell, its the combination of an old Travel Trailer and a Truck Camper. I haven't got the faintest idea what brands were involved in the making of that critter.

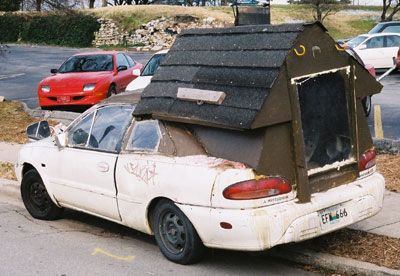
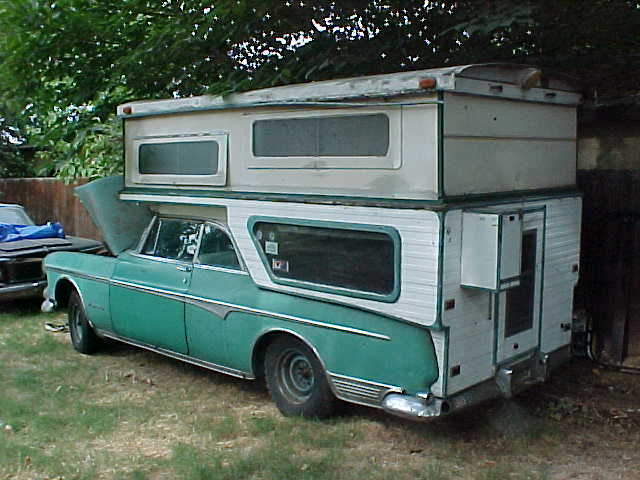
And if that wasn't bad enough, work2much, had to add a 1950's Desoto with its own homemade truck camper on its back.


Which then prompted him to post this one.....


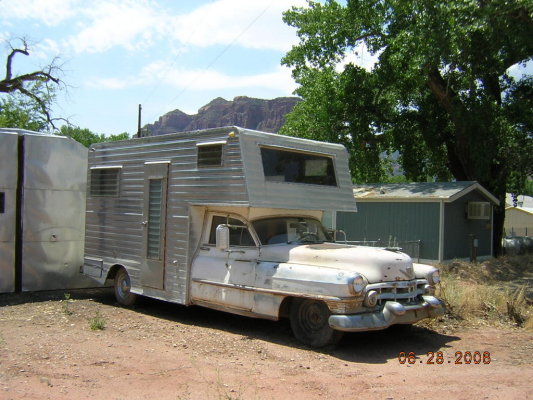
In turn brought bigfootford around to wrap it all up with a CaddyHome....


Just when I thought I was taking a monopoly on Redneck Engineering, folks turn me round and straighten me out to some real masters of the art :p.

Thursday, March 1, 2007

Project #6 - Electrical Upgrades

Project #6 - Electrical Upgrades

This is one of the big ones, I've put it off for a fairly long time, and finally got it done.

Since I had my first taste of winter camping, I knew that the current plugin setup for the little electric heater I use wasn't going to cut it. Having the cord hanging over the sink area while trying to do dishes was a royal pita.

Plus, my little 300 watt Statpower Portawatts Inverter was sitting in the tool box in my truck because it wouldn't work running off my one 12volt cigarette outlet in the camper.

So, a quick trip the hardware store produced this:

Part 1 - Adding a new Circuit for the up coming A/C installation

Well, I haven't really made the announcement yet, but I finally found an A/C unit for my camper. No, its not a Coleman Polar Cub, or any of the common units you see. My camper's roof is not really meant to take any weight, so I had to go with plan B.

For $89.99 at the home Depot, I picked up a Goldstar 5000 BTU A/C, the only one I've managed to find that has dimensions small enough to fit into the pre-existing window opening in the back of the camper. Most units were usually too tall, and I didn't want to do any cutting whatsoever of the walls, the camper's construction is baffling in some aspects and I didn't want to weaken a key area.

But, I digress, I have the A/C unit, its over at my fabricator buddies place to make a bracket of angle, tube and plate that will replace the existing window and securely hold the A/C in the window opening at a slight angle so the water can properly drain out. Its not done yet, so you'll see a dedicated thread to the A/C system when its actually installed.

However, the instructions do specifically state that the unit should be on its own circuit breaker. Its a 15 amp/110v Unit, with a 4.6Amp draw, I think it uses around 550watts of power to run. The cord comes with a GFI unit built in, but I figured seeing as everything in the camper is on one circuit breaker and I have a spot open in the fuse box for one more, I might as well add in a dedicated one for the air conditioner.

This project did finally answer one thing, what AMP service my camper is setup for. The answer? 20 amp. The primary feed wire is rated for 20 amp service coming from the exterior hookup, so all good.

Anyway, the project!
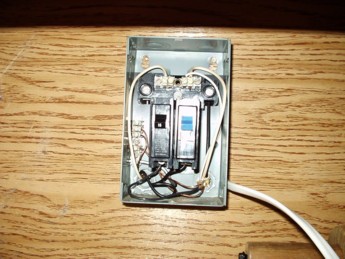


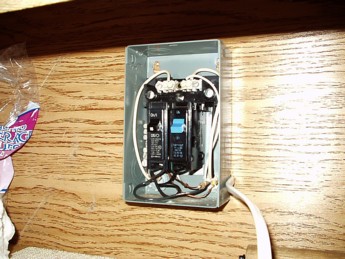
The first part of the project involved figuring out how to add another line of romex wire to the box so I could connect in the second fuse. This was solved by unmounting the box from the wall. KIT's solution to securing the wires, but also recessing them was to cut a notch out of the paneling behind the box so that it just recessed into the pink bat insulation. This made it easy to simply loosen the clamp on the right side, slide in the new romex, then reclamp and resecure the box to the wall.

In the above two pictures, the breaker with the blue tab is the original Bryant 15 amp breaker for the primary outlets, fridge, Converter, etc... The black tabbed one is the new Leviton breaker, also 15 amp, for the A/C unit. The romex coming out the side of the box is going to be routed along the back of the cabinet.
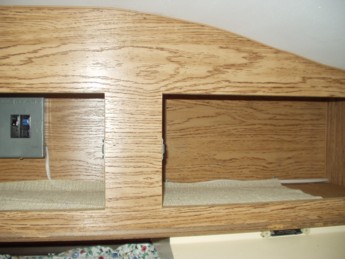


Since routing the wire inside the cabinet floor was not realistic in any way shape or form, I went for second best and routed it using cable ties that I screwed into the wall at various intervals to secure and snug the wire to the back of the cabinet, and out the way of items being stored in there.

As you can see above, the wire snakes neatly along the floor and through a hole drilled between the two cabinet walls.
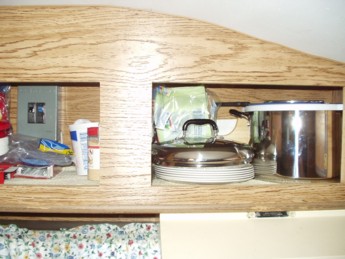


With the cabient reloaded, its impossible to tell there's a wire there at all.
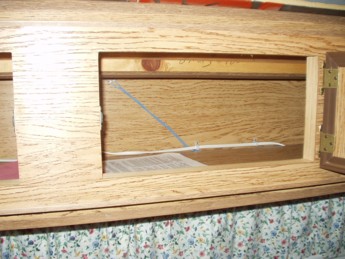


The wire continues along the inside of the over dinette cabinet/bunk bed to about 3/4 of the way along where it disappears down inside the cabinet. I decided to install an "old work" eletrical box for each outlet in this project to protect the wiring.

The final result was:
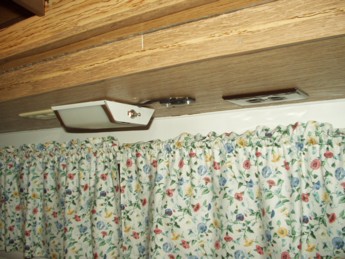

I decided for some odd reason to make all the new specialty outlets brown instead of almond like the originals. I think my logic was that the interior decore is primary shades of brown, so the brown outlets will blend better than the almond.

Part B - Inverter, New Punch Blocks, and the new inverter outlet

Well, now that I was done futzing with the addition of the 110 breaker and new outlet for the up and coming A/C unit, it was time to turn my attention to finishing the work on my 12 volt side of things.

My current tie-in job for my battery bank, plus the feed wire from the camper plug was.... less than satisfactory (Plastic Wire nuts, hose clamps and half a roll of eletrical tape really doesn't cut it in the book of good wiring jobs).

So, a bit of searching at the Home Depot lead me to some very nice dual connection point 4 gauge capable punch blocks. The best part was they came in pairs, so I only needed to buy one set.
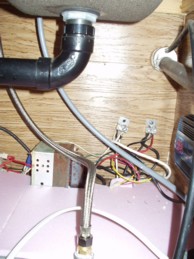


I installed the two of them on the wall under the sink where the wires come into the camper, the one on the right being positive, the one on the left being negative. I seperated out the feed wires from the draw wires so that I could easily join in new items without futzing with the wires that the batteries were hooked up with.

Once both poles were securely mounted to the wall, I used a couple more of those "old work" junction boxes and cut notches out of the sides so they could become protectice covers over the punch blocks.
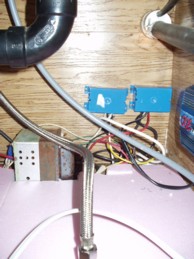
In case you're wondering what that rusty greenish cube is in amongst the pink foam board, that's my sad little converter. It has two wires that come out of it, one for positive, one for negative. Its not made for charging your batteries and you must manually switch from the batteries to it via a switch on the wall. It gets warm, but never hot, there just physically isn't that much in the camper that generate that much 12 volt load.

Anyway, since I now had a good high amp capable connection for my battery bank, I decided to permanently mount and hard-wire my 10 year old Statpower Portawatts 300, 300 watt inverter.
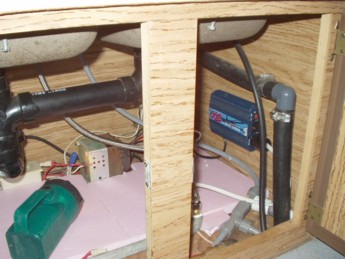

The cord and plug coming out of it, goes to the second outlet I installed. I put a 15 amp/110 3 prong plug on the end so I could plug it into the inverter, or plug it into the outlet next to the converter and turn it into a spare outlet for plugging in the eletric heater in the winter.
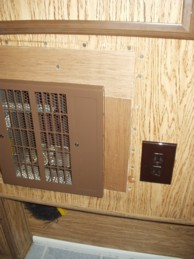


I found a patch of wall between the furnace and the water heater that was hollow and cut out the notch for another eletrical box, and installed another brown outlet.

All said and done, I get better current flow now to the camper from the battery banks, plus my inverter works properly for the first time since we got it years ago to use to run a stereo and eletric fans in the back seat of my parents old 85 Chevy Suburban when we drove back to illinois to visit family.

To test my inverter, I got bored and plugged in my power drill I had been using to make the holes for the wiring for the A/C outlet. Ran like a charm.

Hope you enjoyed reading, I've still got a few more projects to post!
Project #5 - New Weather Station/Clock

Project #5 - New Weather Station/Clock

This project was actually caused by me finding a gift a customer gave to me a number of years ago.

She was an interesting, but very sweet, old lady who used to visit my checkstand all the time and ask my advice for just about anything. She'd also take the time to tell me about her day, and her views of the degredation of the neighborhood that our store was located in.

Well, one day she gave me a clock that she had gotten as a christmas present. She had come in many times before asking my help on how to set it up, and I had shown her how to do it a number of times. This time, she had gotten fed up with it and decided to just give it to me. I said that it was her present and that she should keep it, it was a very nice clock. She insisted and after about 30 minutes of discussion I wound up with the clock, I couldn't talk my way out of it.

Well, I kept the clock for a number of years, since I had no real use for it at home, tucked away in a paper bag in the closet.

Well, the camper happened, and I had still hadn't thought about the clock, till one day, I came in to work and found out by the usual method that news of this nature seems to make its way to me, that the sweet old lady had become ill and had passed away.

I got to thinking about how I was going to miss her and thought back on some of the odder conversations we had over the years, and then I remembered the clock.

On the way home that evening, I picked up some AA batteries and dug out the clock. The old mercury thermometer setup the camper had come with for interior/exterior temperatures had died shortly after the camper's first trip out to Odell Lake, so I figured this would be a good replacement.

Well, I had forgotten how the clock worked by this time, and the manual was the one thing the sweet old lady had forgotten to supply me with. So, I popped online and did a search for the operations manual.


Well, turns out the lady had given me a $120 clock! The damned thing does just about everything! From telling me the interior/exterior temp, realtive humidity, day of the week, what the date is, what the moon phase is, plus it updates itself from the broadcast signal coming from Ft. Collins Colorado's Atomic clocks.

So, now, I have a very nice weather station for my camper, and when I go to read the time, I always think back to the little old lady who always made my ****ty days at work just a little bit nicer.

Project #3 - Fridge Cooling Fans

Project #3 - Fridge Cooling Fans

For a while I had asked about mounting fans to the cooling fins in an ammonia absorption fridge to help with air circulation. Thanks to a lot of people I got great advice on adding a "Draft Induction" system to my fridge in addition to my interior fans as well as a tip on relocating the thermostat wires to allow the fridge to run colder than it normally would have. The combination of all three helped my 32 year old G.E. Fridge quite a bit.

The interior fans helped to make it so that the fridge is now equally cold, stuff on the door stays cold as well as stuff in the back of the fridge.

The exterior fans helped move the hot air that would stagnate in the exhaust stack in the back of the fridge, which reduced its cooling capacity.

My fridge now stays icy cold even in direct sunlight on the camper and when the interior of the camper is 90+ degrees, the fridge stays down where it should be.

Now, onto the project, as always, click on any of the pictures for a larger view.


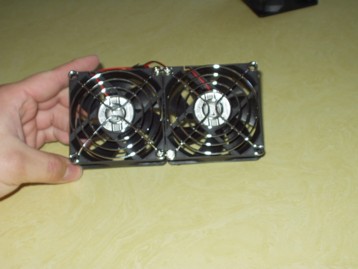
For my project, I decided I would need about 4 fans for the combination of the interior and exterior. So, I went to our local Fry's electronics here in oregon and picked up a 4 pack of 80mm x 80mm Case fans for $15.

These fans each move about 6 CFM of air, but only draw 0.16 amps of 12 volt power. The combination of all 4 running all the time consumes ~15AH's a day, if my math is remotely accurate (0.16 amps x 4 fans = 0.64 amps drawn x 24 hrs = 15.36 AH), so for my average 4 day camping trip that would burn around 60 AH's of battery, right now, I have 1 group 27 Battery that has show amazing vitality in that it ran my camper with 2 people and showering daily and cooking and doing dishes and lights for 4 days without being run down. I will be adding a second bank of batteries to the camper here in the near future to add additional capacity (2 Trojan SCS225 Batteries @ 130 AH each).

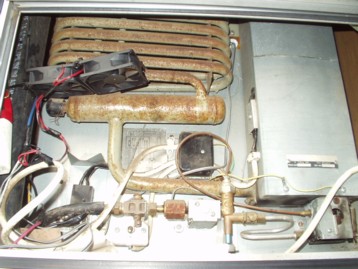
I also picked up a 2 pack of grates for the interior fans to keep food packages from getting stuck into the fan blades by accident. To simplify installation, I glued the two interior fans together and then attached the covers with the screws they came with in the center bolt holes. The outer holes will be used to secure the fans to the fridge fins.


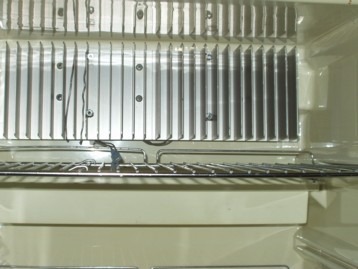
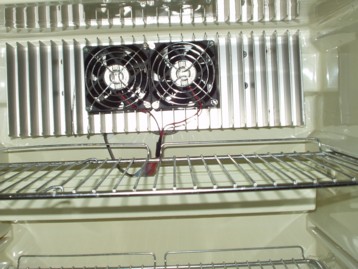
To secure the fans in place I super glued 4 nuts to the correct spots on the fins. I used a fairly small nut and screw combo so that I wasn't attaching a large chunk of metal to the thinest part of the fins. I routed the wire for the 12 volt supply through the existing access hole in the back where the thermostat wires came through. I used fully insulated blade connectors to connect the fan to the wiring, so that if I needed to remove the fans for cleaning, I could completely unattach them and take them out of the fridge.


The fans are now in place, secured firmly by the four small nuts you saw in the previous picture. They're centered in the fins as the right side tends to get coldest first and also the milk spot on the shelf is just to the left of the left fan, so the positioning was perfect to prevent blockage of air flow.


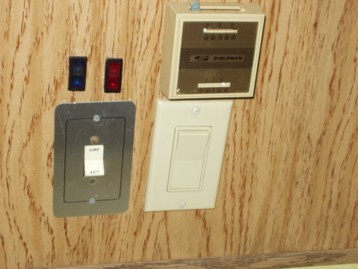
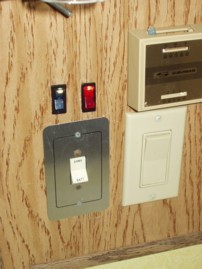
For the exterior and interior fans, I installed 2 LED illuminated toggle switches I picked up from Bi-Mart for $1.99 each, rated for 20amps. I chose two different colors for the different fan banks, blue interior (Cold Air Fans), red exterior (Hot Air Fans).


These switches are all in the right hand side of the fridge, so the wiring was short, as just below the fridge is the fuse block and I just tied into an existing 20 amp fuse.


My exterior cooling fans WERE mounted between the door and the coils so they pull air in through the louvers and blow it up over the coils and through the top. Not the most perfect looking setup, but then it was a PITA to get those to balance in place while snugging the zip ties, however, after getting somewhat worried about the straps wearing on the coils, I relocated them to the door itself, so they lift up out of the way when you open the access door, and drop right back into the best spot when closed. They no longer are in direct contact with the coils, and seem to be doing a better job where they are now, than where I had them before. I just haven't gotten around to taking a newer photo.


All in All, the project probably cost about $23 to add a good system of air discharge both hot and cold. At some point, I may add a third fan to the interior block on the right, but for now the 2 in the center work great and I still have room to put taller containers around the fans without blocking any.

Come back Again for Project #4, Insulating the Cab-Over Floor

Project #2 - Bathroom Improvements

Project #2 - Bathroom Improvements: Shower Curtain, Soap Dish, Shower Head Shutoff Valve

This is probably one of my more basic projects and didn't really cost me more than $7-8 everything totaled.

I'll go over the really more interesting one, which was adding a shut off valve first.

My camper still has its original bathroom faucet which doubles as a combination sink faucet and shower feed. To change between them there's a little knob on the top that turned one direction, the water comes out the sink faucet end, turned the other, the shower head. Turned half way, its the really poor excuse for a pause, as the original shower head has no pause of any form on it.

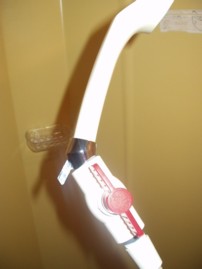
The current setup really didn't work for saving water or pausing the water durign a shower, the pump would strobe constantly and a fair amount of water would wind up heading down the drain. Since I wanted to keep my existing showerhead (the bracket for hanging it on the wall is a permanent part of it) since it did a nice job on low water volume for rinsing, I had to devise a solution for cutting off the water going out the head during a shower without having to turn the faucet on and off.

My Solution:


A 1" diameter cutoff valve from the sprinkler plumbing section, a bit of teflon tape, and a stubby double male ended piece of threaded pvc pipe from the yard sprinker selection. The larger handle of the ball valve makes for very easy turning of the shower head on and off with soapy slippery hands and is just the right size to just couple directly in line with the shower head without having to change fitting diameters. This solution will work with any standard household shower hose and head and set me back a whole $3.00 to make from stuff I found at Home Depot.

Unfortunately, my shower hose leaks a little, but it was doing that before I put the valve in. The original shower hose was shot, so I took one of the used spares from the tool cabinet to substitute in. Eventually I get around to getting a new hose. For now, it works fine and the pump only strobes a milisecond every great once in a while, something that will be taken care of with the new hose.


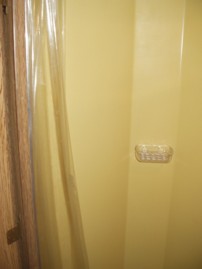
My other basic things, adding a shower curtain and a soap dish. My camper's shower had no track for a shower curtain, or for that matter a shower curtain when I bought it. We tried one trip with having just put a stick on weather stripping around the shower door, but it really didn't seal very well and water still leaked out onto the floor. So, using a spare used shower curtain we had left over from the upstairs tub, I cut it directly in half and fitted it to a spring rod above the door. The old shower curtain had little suction cups on one end for sticking to the wall of the shower, which worked nicely at keeping the end next to the sink in place so that water can't get around it. When not in use the shower curtain tucks in the corner behind the toilet and stays put even after traveling down the road, albiet the spring rod has popped loose a couple times from some heavy jarring of the camper by the road.

I added both a suction cup hung squegee on the wall over the sink (Not Featured in photo) and the little soap dish in the corner for sticking my bar soap and shampoo bottle in. Since I have a smaller travel size bottle I use for shampoo during trips, they both fit perfectly in the soap dish so I can just hang my wash cloth on one of the many hooks on the wall inbetween scrubbing and rinsing and for drying out after shower time is over.

Project #1 - Mo' Batteries

Project #1 - Mo' Batteries

First off, let me thank fellow NATCOA member Sooty1234, if it weren't for him I wouldn't have the two nice SCS225's I do now. I want to also thank forum member Matthew_B of Dallas, Oregon for the idea for locating the batteries from a setup he had done on his own camper.

Now, as most of you know, my camper is old. And being as old as it is, when it was built, the concept of onboard house batteries in a camper were unheard of. If you had a battery, it was housed in the engine compartment of the truck. On my current setup, I already have this, one solitary Group 27 under the hood of the truck to feed the camper, not a whole lotta battery capacity there.

For a while, I didn't know exactly which batteries I wanted to go with for additional house batteries, till a fellow natcoa member had posted an add for a set of brand new unused SCS225s. One interesting drive north to meet a fellow Natcoa member and $100 later, I had two unused, but maintained SCS225 batteries.

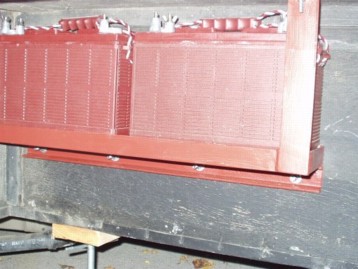
The question then became of how to mount them. I really wanted the batteries to stay with the camper when it was loaded and unloaded. SCS225's are heavy batteries, and the thought of having to lug them up into and back out of the truck each time I loaded and unloaded so my camper would keep house power didn't really appeal to me. So, I contacted my metal fabricator buddy to make this for me:


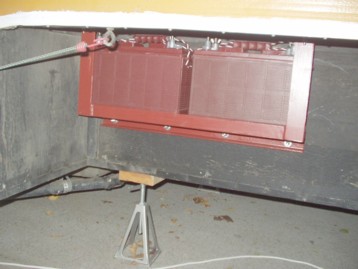
It's a nice piece of iron work, made from angel, channel, flat, and a piece of square tubing. Its sized so that the batteries can't wiggle back out once loaded, but with a bit of effort can be pried out. (BTW, this concept was tested and proven to work by driving around downtown seattle with the camper loaded. Didn't budge an inch even after the royal beating my suspension got.)


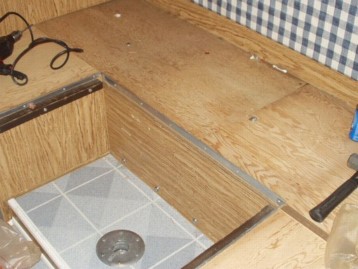
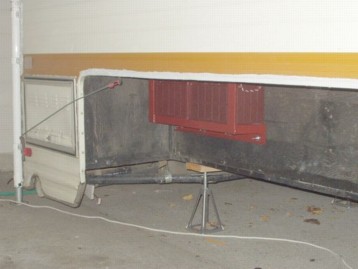
I was really limited to only one location I could add a battery rack on my camper as reaching other locations from the inside was near impossible due to lack of clearance or appliances being in the way. So, I wound up installing it underneath my dinette. To keep people from getting scraped on or my cushions from getting damaged, the rack was secured in place using Carriage bolts with washers to help displace the load on each. My side walls on the truck bed portion of my camper are just solid plywood, rather than a combination of skin and 1x2s, so there wasn't really anything to worry about drilling through when it came time to do the drilling. The lower lag bolts (3 of them) are visible inside the camper, but unless the table top's off, yer very unlikely to even notice them, as they're just barely above the floor.


I wound up routing my 8 gauge wires that feed my batteries to the main system along the outside of the camper. There really wasn't any good way to go along the inside, so I used a combination of staples and zip ties to snug the bundled wires in place along the inside corners of the camper wings. Along the front of the truck box portion, I switched to some left over washers and drywall screws to help secure it as I had run out of staples, the washer approach was far more secure than just the zip ties, but was a pita to make corrections with.

I still need to get some join blocks to connect all my feed wires together at, for my Sol Duc trip, I just used a couple of wire nuts and electric tape.