Sunday, May 29, 2016

Rebuilding the Amerigo– Fix more rot, and first rear jack is installed

Rot, just when you’ve thought you found all of it in an area, you find a bit more Winking smile

In this instance, it actually wasn’t alot, the bulk majority was in the bottom three inches of a board, the downside is said board was also key to tying the floor into the rear wall. 

Didn’t help that in my process of trying to remove the corner 2x2, I broke the one it was joined to and ended up having to replace both…..

So, off came the siding on the rear of the wall, mercifully it was two pieces, out came the glued together threesome of 2x2s (not sure why they did that, discovered they didn’t even do that on the other side when I worked on it), and sadly, also out came the corner board of the rear wall, because it snapped in two when I was trying to separate it from the corner pieces.   

Ended up replacing it with a single 2x6, again not understanding the supposed “cost savings” of having to have someone cut three pieces of 2x2 and glue them together, vs cut one 2x6 once, and glue and screw it in…..

Before tying the rear wall and the new corner back together, I jacked the camper up using the new jack on its bracket to put a piece of 2x2 underneath and then lowered it back down to use the camper’s own weight to help lift the floor back up and get rid of some of the butt sag. 

P1150372P1150373P1150371P1150374

Also made another “Where’s the Wood?” discover in this corner, as it appears that in ‘75 to save money, Gardner decided to just laminate in scraps of 5/8” plywood to use to anchor the screw strips along the outer edge, and then slap in a couple scraps of 2x4 using two-hundred staples along the edge to use for the seam between the siding and where the patio light went.

In 1974, there was 2x2s behind these areas, in 1975, just the chinzy plywood.   So, I added in some 2x2 scraps I had left over to give me something substantial to tie the siding back into, as well as to anchor the screw strips in on the seams. 

Extra plus, it got rid of a dented in spot in the siding that occured because there was nothing backign the siding. 

P1150376P1150375

The skirting around the stairs was toast, the plywood was rotted beyond any idea of salvage, but was still solid enough to trace onto a new sheet and cut out its replacement.  Come to the realization that on this camper, if its plywood, it will all be 5/8” thick. 

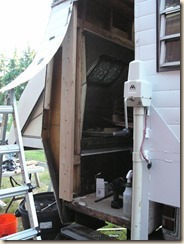
Bout this point, I installed the carriage bolts through the 2x2 on the right side of the door jam to tie in the new jack bracket.  It also bolts through the new framing in the upper side wall where a 2x6 and 2x4 carry the jack load all the way up to the main header beam at the top of the wall.  

In addition to these tie ins, there’s a reason for that plate that hangs down over the side the truck.  To help with the lateral stress where these jacks attach, two of the original jack mounts were modified so that they will bolt flush through that plate and transfer part of the jack load into the underside of the wing, just as they did when the camper was originally built. 

P1150377

Missus waiting on the steps for me to put the camera away and go in for the night.

P1150380

And done!  

The door now shuts square, the siding doesn’t have a dent in the lower part of the tail anymore (sadly has a couple new dents up at the top from where the siding had been buckled from the rear sag that I repaired), and the camper no longer makes an ominous creaking sound when I climb up and down the stairs Smile

P1150386

Thursday, May 26, 2016

Rebuilding the Amerigo–Small Epiphanies

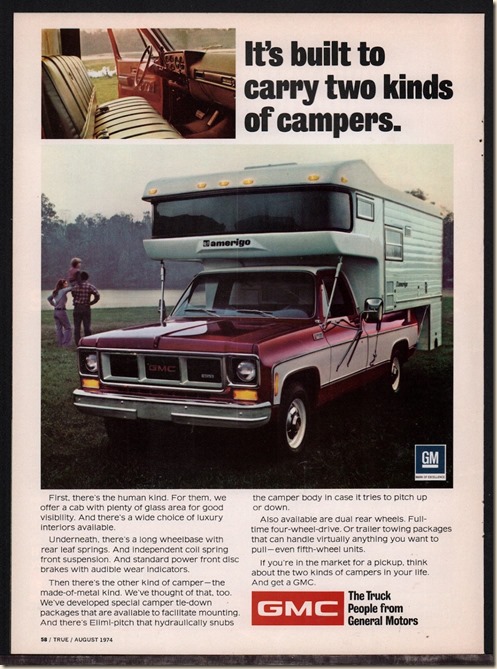
[image]During my last entry I posted several pictures of my work in demo-ing the cabover bed area.   One thing that had puzzled me during that process was the odd little blocked in corners in the frame. 


At the time I was thinking, “Naw, that can’t be for a cab-over strut, only Lance camper had those….”


Then during my hunt for brochures and other things camping from the 70s and 80s, I came across this old GMC/Amerigo ad from 1974 (Trying to find any old materials about Gardner Industries and KOA’s partnership during the 70s).

s-l1600

Well Damn, that looks like cabover struts!

Wednesday, May 25, 2016

Rebuilding the Amerigo–Call me Fix-it Felix!

Well, that’s two movie references so far, wonder how long before I run out of puns as I continue my work on rebuild the Going MerrySmile


Since my last update, the camper pretty much sat on the back of the truck, under a tree in my drive way through pretty much all of the winter.   Alot of the winter months involved me having trouble doing little else on my weekends except sleeping, between work stress, holidays, and not getting enough sleep week in and week out, the poor Amerigo sat untouched until this month.

I’ve done more in the past month than I had in the past five.

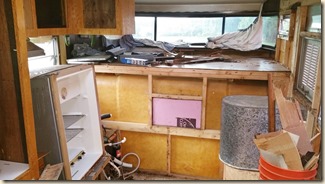
So, to start off where I left off, I continued into my demolition of the cabinets and wall paneling on the passenger side of the camper. 

After I finally got the stage where I could remove the propane compartment and the cabinet housing the fridge, I made my first rot discovery.

In this instance, it wasn’t so much as finding the rot, as it was finding the rot that the previous owner had found and had tried to fix without a whole lot of success. 

I quite literally was able to grab hand fulls of the plywood and pull it out like a handful of potato chips. 

The patched in piece of 2x4?   Came off in my hand where it had been epoxied in place.   So, time to just get rid of the whole beam and replace it with a new one Smile.

Out with the old….

20160510_155732

In with the new Smile

20160511_14423620160511_14424520160511_144248


Much thanks to my neighbor, Robert, who actually did the removal and reinstallation of the wing. This was a late sunday find and with it all unbuttoned and rain in the forecast, it was a race against the devil to get it done and closed back up in time for the weather to go to pot again.

One thing we did discover was when the Amerigo was built, they were using longer than eight foot sheets of plywood to build it. 

I took a page from the KIT’s design as a solution.  

The wing is now made of two sandwiched and glued (With 3M 5200), sheets of 5/8” plywood.  The seams are staggered so that it makes one solid sheet and givesi the necessary rigidity needed.  I will likely add a second sheet onto the driver’s side as well to give both sides some extra durability. 


20160523_194921

Sorry for the mess, but I’m running of places to stick bibs and bobs as they come off the camper, so, its kind of a migrating mess in the Amerigo right now. 

Since the corner wood was rotten as well, I took this opportunity to properly rebuild the front corner (will do the same on the other side as needed) using 2x6’s in the lower area where the jack attaches and extending the loading all the way to the top beam using added in 2x4s to make the frame strong enough to handle corner jacks. 


20160523_19490820160523_194934

20160523_195051

I did the same in the rear where my custom rear brackets will attach, to carry the load through the main frame (I still need to cut and install the 2x4’s that go above it). 

P1150366


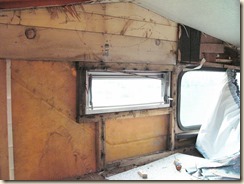
Demolition is coming along well, other than I have an utter hatred of the double cresent security screws that the entire camper is put together with

P1150363

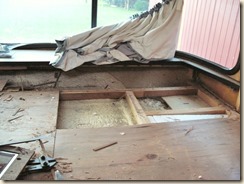
Other than the wing, I haven’t found any major rot, however, now that I am digging into the cabover, I’m finding instead of rot, evidence that the camper was either:

A.) Assembled starting on a Friday and finished on a Monday

B.) At some point had to have some repairs done during warranty at a dealership that didn’t know what they were doing. 


First off, looking at WagoneerTruckster’s ‘74 during their remodel and looking at my ‘75 which is the exactly same model, one year newer, its obvious that Gardner Industries started cutting ALOT of corners.   There’s several areas where less framing is present, in the case of the cabover, pieces of framing are missing all together.

Wagonqueen Truckster’s 74’ factory framing (From her blog, Amerigo Truck Camper Restoration - Uh oh, What did you do?)

74-front-destruct

75’ Amerigo Factory Framing, notice the difference?

20160523_195007P1150363

On the driver’s side, there are 2x2s that are installed that go all the way out to the edge of the cabover, tapered to fit the curvature of the nose cap.  The wall paneling on this side is attached to these 2x2s and stops flush at the cabover floor.  

The window is framed with a different breed of wood and is assembled using the wide gauge staples that were common in alot of other truck camper brands during that era.  No where else in the frame of the Amerigo are these staples present, just this one windows frame out (Which I plan to tear out most of and redo). 

P1150365

On the Passenger side, the extra 2x2s are not present and there’s no tapered piece at the front corner, instead the paneling on this side goes all the way down to the bottom of the frame. 


20160523_19493420160523_195023P1150364

Then, don’t get me started on the bed platform design…… 

Really, who thought hanging a small piece of paneling from the edge of the unsupported 2x2 that makes up the front frame for the bed floor to another piece of paneling attached to the underside of the window shelf was a good structural idea?!

Again, there’s major differences in the two model years, in Wagonqueen’s unit, the fiberglass is bare, and its easy for them to add additional framing underneath the existing bed frame.  As you can see in the photo below, in mine they decided to spray in expanding foam and glass in bits of plywood here and there.

P1150364

There really isn’t any room on the underside to add more framing to properly stiffen the bed frame, so the end solution is going to be to add additional 2x4s/2x2s to the side wall frames, then build a second 2x2/2x4 based bed frame that will go on top of the existing one, and stiffen and sandwich the two together, make the bed platform 3” thick instead of 1 1/2 “ thick. 

It will also allow me to extend the bed frame all the way up under the window shelf like it should have been, and extend back an additional several inches inwards into the camper to make it possible to fit a queen size mattress in the cabover.

My plan is to fully enclose the cabover area, with just a small entry spot near the fridge.   I haven’t decided on if we want to make a curtain or some kind of hatch for this, and that will likely be something added later, for now, it will simply be an opening just a little wider than the fully opened fridge door. 

The fridge is being shifted back several inches, and in the process shortening the dinette some, to both center the fridge on the access door, and to center its fins beneath the roof vent, both of which were heavily off set before. 


And, now you’re up to date Smile.