Wednesday, September 28, 2011

Backlogged Projects: Second Cargo Net for the Cabover

Backlogged Project To-Do List:

1.) Charging System needs to be rewired (Again), converter relocated from under the kitchen sink to under the dinette, right next to the batteries (Something I should have done when I rewired the charging system back in 2009, but didn’t). Plus, a new Battery Disconnect needs to be installed, the original 75amp Pollack switch is falling apart.

Also, I need to incorporate my battery voltage meter center that I fashioned into the electrical system so I can actually watch my battery charge.

2.) The two Trojan SCS225 Deep cycles on the camper that I bought for a steal back in 2006 also need replacing, they no longer hold a good charge anymore, odds are one of the batteries is shorted.

3.) New Camper plugs need to be installed, replacing the under-rated RV 7 pin hook up with a 100amp Lift-gate plug for the charging wires and a separate 4-pin round plug for the running lights. Charge wiring coming from the alternator needs to be fully scrapped and replaced with a good 4 gauge run instead of the under-rated 8 gauge system I put in back in 2006.

4.) Front of the Camper’s tub needs to have a bolstering frame built onto it, it has always flexed and moved too much whenever the camper has been lifted for loading and unloading.

5.) The 3 year old Shurflo Extreme Smart Sensor 4.0 water pump needs to be replaced (fortunately, Shurflo replaced this as a “Good Will” warranty exchange, since I bought the pump in ‘09, but it was manufactured in 2007) as it has started leaking water around the body and is pushing pressure back towards the tank.

6.) Replace the broken down intermediate steering linkage on the truck to tighten up the steering for improved handling.


This particular project isn’t one of the main must-be-dones on the list, but a very useful little side project that I’ve been wanting to do for a number of years now, but hadn’t found another good source for smaller. but similar cargo nets. 

Back in 2008, when I first started full-timing, I began acquiring a large number of books to read.  At the time,  I didn’t have TV in the camper (or a laptop), so reading was my main source of entertainment. 

The problem was, as I acquired books, I filled up the cabover shelf, which has no means of really securing anything placed on it for travel. 

For a few trips that summer, I went as is, and the books would eventually all fall off the shelf, which got a little old. 

So, my first fix was to buy the biggest Boat-N-Go bulkhead cargo net I could find.   This worked for the most part for a number of years, but the books on the ends usually tried to slip out and I have a roughly foot long gap at one end where the Boat-N-Go net came up short. 

The problem was, the Boat-n-Go nets only came in two sizes, both too big to use for overlap without it being both A.) A waste of money, the Boat-N-Go nets costs over $30 before shipping B.) silly looking. 

I tried a little looking around and asking on forums, but really didn’t find anything. 

A random search one day at work, however, turned up CargoGear.com, who specializes in nothing but cargo securing devices for autos, RVs, and boats. 

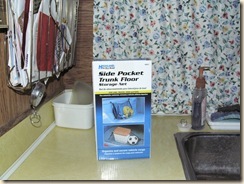
On there, I found this:

P1110376

For $18 (+3$ for shipping) I found a similarly sized, height-wise, but narrower cargo net to use for an overlap.

P1110385P1110388

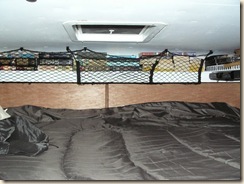
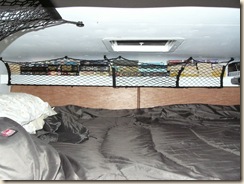
A little relocation of a couple of the anchor points from the old cargo net, and I now have all of my books secured on the cabover shelf. 

As you can see I also have videos up there, but those I don’t worry about as I have a little piece of cardboard I cut to fit that slides in front of them and keeps them from falling off the shelf while underway. 

Tuesday, September 27, 2011

Backlogged Projects: Replacing OEM Intermediate Steering Shaft with Borgeson aftermarket

Backlogged Project To-Do List:

1.) Charging System needs to be rewired (Again), converter relocated from under the kitchen sink to under the dinette, right next to the batteries (Something I should have done when I rewired the charging system back in 2009, but didn’t). Plus, a new Battery Disconnect needs to be installed, the original 75amp Pollack switch is falling apart.

Also, I need to incorporate my battery voltage meter center that I fashioned into the electrical system so I can actually watch my battery charge.

2.) The two Trojan SCS225 Deep cycles on the camper that I bought for a steal back in 2006 also need replacing, they no longer hold a good charge anymore, odds are one of the batteries is shorted.

3.) New Camper plugs need to be installed, replacing the under-rated RV 7 pin hook up with a 100amp Lift-gate plug for the charging wires and a separate 4-pin round plug for the running lights. Charge wiring coming from the alternator needs to be fully scrapped and replaced with a good 4 gauge run instead of the under-rated 8 gauge system I put in back in 2006.

4.) Front of the Camper’s tub needs to have a bolstering frame built onto it, it has always flexed and moved too much whenever the camper has been lifted for loading and unloading.

5.) The 3 year old Shurflo Extreme Smart Sensor 4.0 water pump needs to be replaced (fortunately, Shurflo replaced this as a “Good Will” warranty exchange, since I bought the pump in ‘09, but it was manufactured in 2007) as it has started leaking water around the body and is pushing pressure back towards the tank.

6.) Replace the broken down intermediate steering linkage on the truck to tighten up the steering for improved handling.


Amazing how fast you can get projects done when there’s a trip on the line and money in the bank Smile with tongue out.


All the electrical work is all done, now, truck and camper are setup for heavy duty charging, new batteries are on board so dry camping is back to full capacity again and I now have a battery meter for monitoring the state of my battery bank. 


That brings us to fixing a problem that has plagued both my Dodge trucks in the time that I’ve owned them, but never fixed, till now.

The quarter wheel turn steering slop. 

Somewhere in the 1980s or early 90s, Dodge decided to get rid of their standard U-jointed intermediate steering shaft coming from the steering box on the truck and coupling via what is called a “Rag Joint” to the steering wheel shaft coming from the cab. 

In its place, they put a form of safety knuckle that would break away in the event of an accident to keep from impaling the driver with the steering wheel.    I don’t know how often steering wheel impalings occurred, wasn’t something you heard reported in the news to best of my knowledge, but apparently it was happening enough that this piece of garbage was created. 

The joint basically was a little rectangular box into which the steering shaft was slid, a pin driven through the end to allow two little rectangular runners to slide onto the ends of the pin.   No method of permanent attachment exists on these runners, they’re simply held in place by the box. 

Over time, those little pot metal guides disintegrate, usually starting shortly after the flimsy rubber gasket at the top of this giant water bucket of a box knuckle fails. 

For $25, you can buy a rebuild kit, that replaces the two little guides and the rubber gasket.   Everything I’d read on this rebuild kit indicated that in as little as 4000 miles, the slop problem would resurface again. 

Not interested in doing this dance twice, I decided, after polling a couple Dodge Truck Forums, to go with a far more expensive, but far more durable replacement from Borgeson Steering Products. 


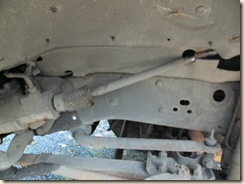
P1110354The original intermediate steering shaft in place on the truck and the garbage safety knuckle. 

I removed my driver’s side front tire for ease of access to the steering parts.


You can see the slop in the linkage as I grab the steering shaft and am able to turn it back and forth with an audible clunking sound with even moving the linkage itself at the steering box.


Removal of the old steering shaft involves driving out a retaining pin the safety knuckle, which can be done with a super long Phillips screw driver (to allow you to swing outside the fender well for more energy and accuracy) after soaking the pin with WD-40 and letting it sit for about 30 minutes, then using a 10mm star pattern socket removing the two bolts attaching the intermediate shaft to the rag joint and backing out the safety pints temporarily to allow you to swing it up and pull it out. 

If the intermediate shaft doesn’t wanna play nice, you can do as I did, and use a small piece of 1x2 to tap the shaft loose of the knuckle (don’t worry, it’ll just fall apart if its anything like mine) and then you can wiggle the knuckle end lose to remove it from the steering box.

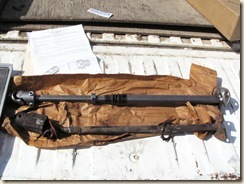
P1110356Here’s a side by side comparison of the original intermediate steering shaft and the “Made in the USA” Borgeson replacement.

The Borgeson replacement is far more substantial than the original and is adjustable in length to fit a fairly wide range of Dodge trucks.  I believe the model I have is meant to fit Dodges from 1977 to 1993, the last year of the old body style. 

You can also see the needle joint-based knuckle that attaches to the steering box vs the garbage safety knuckle that came off. 

Once you have your steering pointed perfectly straight forward and your steering wheel in the proper alignment for straight forward driving, slide the knuckle onto the steering box splines and feed the other end up to the rag joint and reattach it. 

Being certain to fit the knuckle down so that the spline shaft coming off the steering box is deep enough in to be flush with the end of the fitting in the knuckle, but not too deep to cause binding in the U-joint, you can use a sharpie to mark where the retaining pin will hit, then slide the knuckle off and file down that spot.   You will not be reusing the old retaining notch that the factory steering used.

If you’re like me, I used a drill bit that was a little narrower than the threads in the retaining pin hole to pilot start a hole for the retaining pin, then slid the knuckle off and used a bit that would be just wide enough for the pin to enter to make a slot for the pin to lock into. 

Tighten up all the screws and nuts and don’t forget to secure the retaining ring in place on the middle of the shaft by the boot. 

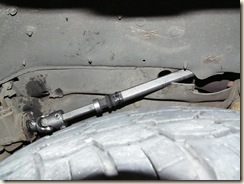
P1110359


I’ve done a little testing of the steering with the new steering shaft and the tightness is rather astounding after having such loose steering from the day I bought my first Dodge.   I look forward to seeing how it all holds up to the load of the camper on the rear and the ruts in the road, something the dually conversion really exacerbated with the sloppy front steering.

Monday, September 26, 2011

Backlogged Projects: Heavy Duty Charging Circuit–Camper End

Backlogged Project To-Do List:

1.) Charging System needs to be rewired (Again), converter relocated from under the kitchen sink to under the dinette, right next to the batteries (Something I should have done when I rewired the charging system back in 2009, but didn’t). Plus, a new Battery Disconnect needs to be installed, the original 75amp Pollack switch is falling apart.

Also, I need to incorporate my battery voltage meter center that I fashioned into the electrical system so I can actually watch my battery charge.

2.) The two Trojan SCS225 Deep cycles on the camper that I bought for a steal back in 2006 also need replacing, they no longer hold a good charge anymore, odds are one of the batteries is shorted.

3.) New Camper plugs need to be installed, replacing the under-rated RV 7 pin hook up with a 100amp Lift-gate plug for the charging wires and a separate 4-pin round plug for the running lights. Charge wiring coming from the alternator needs to be fully scrapped and replaced with a good 4 gauge run instead of the under-rated 8 gauge system I put in back in 2006.

4.) Front of the Camper’s tub needs to have a bolstering frame built onto it, it has always flexed and moved too much whenever the camper has been lifted for loading and unloading.

5.) The 3 year old Shurflo Extreme Smart Sensor 4.0 water pump needs to be replaced (fortunately, Shurflo replaced this as a “Good Will” warranty exchange, since I bought the pump in ‘09, but it was manufactured in 2007) as it has started leaking water around the body and is pushing pressure back towards the tank.

6.) Replace the broken down intermediate steering linkage on the truck to tighten up the steering for improved handling.


I’m moving full steam ahead now, the truck’s been rewired, and now it’s the camper’s turn.  

On the camper end of things, there wasn’t quite as much complete rewiring needing to be done, rather it simply needed some poor choices rectified. 

Case in point, when I bought the camper, the onboard converter wasn’t even designed to charge a battery, you actually switched between the convert and the battery using a switch on the wall.

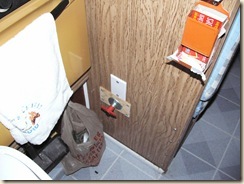
P7080221 When I decided to wire the camper for its first onboard battery set, ever, and got a free Todd electronics Converter from Mjgcamper, I decided to reuse the original location of the converter, which happened to be underneath the kitchen sink, quite a ways from where the batteries were actually located, underneath the dinette. 

The original wiring was done, of course with more of that wonderful under-sized 8 gauge wire that I loved so much (mostly because at the time, it was $0.46 a foot, where as the heavier stuff was closer to a dollar a foot and I took the penny smart and pound dumb approach to my wiring) and believe it or not, this actually worked just fine for a year or two, before I tinkered with it here and there and it eventually stopped conducting a clean current to the camper’s systems. 

In 2008, I replaced the Todd Converter, concerned about the batteries being over charged if left connected all the time (the told Todd had two options, 13.6 or 14.4, and no automatic circuits, you selected one or the other by flipping a switch).    In its place went a WFCO 35amp deck charger, right into the same under the sink location.

This also worked fine for a year or so on that old 8 gauge wire.

The turning point where I said, “enough is enough”, was on a camping trip in 2009 where the electrical system was in such bad shape that the batteries weren’t charging properly and we had to use the generator more often than not just to get the camper through the day and part of the night. 

At that point, I rewired the camper using the right gauge of wire, 4 gauge, and cleaned up the connection points use they used proper joins and wiring blocks, but, in my infinite genius, still left the converter where it was.

“But it had proper heavy duty wiring running to it, why should that make a difference?” you might ask. 

Well, the distance does make a difference, even with that heavy wire, as the converter cannot properly sense the state of the batteries as the distance seems to lessen the loading effect of a discharged battery or even a charged one when sensed by the 3-stage converter I have. 

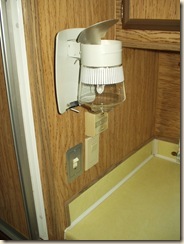
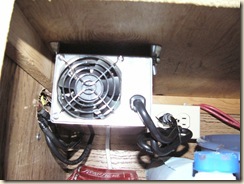
So, doing what I should have done back in 2006 when I first put a battery on the camper, I pulled the converter out from under the sink, and relocated its switched outlet to a dinette cabinet, just on the other side of the wall from the batteries, where I also added a heavy duty battery disconnect switch, replacing my old 70amp pollak push-pull style that had been original under the fridge. 

P1110373P1110374


Now, I still need to get back to Home Depot and get a piece of soffit louver to use on my compartment door that the converter is now housed in to improve its ventilation, but till then I just leave the door open a crack, that little part of the project will be wrapped up come this weekend (The 1st of October).

Sadly, I ended up having to make a patch board out of a piece of scrap plywood to mount the switch through, the original opening I cut for the switch to pass through the outer facing on the partition wall got chewed up too much to directly attach. 

The little face plate just above it is to hide a hole I cut in the paneling to route a piece of trailer tow light wire I had left over (only 2 of the original 4 wires, 14 gauge) from the battery connection to my new battery gauge.

P1110379

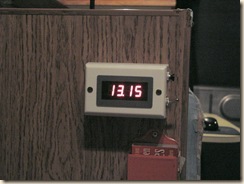
I bought the ready-made 8v-30v rated voltage meter from a dealer off ebay in 2010 when another poster at a forum I was reading showed it as an electrical upgrade they had done.   The meter only cost around $15 at the time, and making an enclosure for it was simple.

I merely used a large surface mount outlet box to which I attached and wired two switches, a moment switch and a basic single pole on-off switch.  Using a file, I widened a light switch face plate to accommodate the meter and then fastened it all together. 


The camper batteries have also been replaced in all of this, to the tune of $404, but I really didn’t feel like taking pictures of the batteries, they look exactly the same as they did back in my first project, Mo’ Batteries. 

Sunday, September 25, 2011

Backlogged Projects: Heavy Duty Charging System–Truck end

Backlogged Project To-Do List:

1.) Charging System needs to be rewired (Again), converter relocated from under the kitchen sink to under the dinette, right next to the batteries (Something I should have done when I rewired the charging system back in 2009, but didn’t). Plus, a new Battery Disconnect needs to be installed, the original 75amp Pollack switch is falling apart.

Also, I need to incorporate my battery voltage meter center that I fashioned into the electrical system so I can actually watch my battery charge.

2.) The two Trojan SCS225 Deep cycles on the camper that I bought for a steal back in 2006 also need replacing, they no longer hold a good charge anymore, odds are one of the batteries is shorted.

3.) New Camper plugs need to be installed, replacing the under-rated RV 7 pin hook up with a 100amp Lift-gate plug for the charging wires and a separate 4-pin round plug for the running lights. Charge wiring coming from the alternator needs to be fully scrapped and replaced with a good 4 gauge run instead of the under-rated 8 gauge system I put in back in 2006.

4.) Front of the Camper’s tub needs to have a bolstering frame built onto it, it has always flexed and moved too much whenever the camper has been lifted for loading and unloading.

5.) The 3 year old Shurflo Extreme Smart Sensor 4.0 water pump needs to be replaced (fortunately, Shurflo replaced this as a “Good Will” warranty exchange, since I bought the pump in ‘09, but it was manufactured in 2007) as it has started leaking water around the body and is pushing pressure back towards the tank.

6.) Replace the broken down intermediate steering linkage on the truck to tighten up the steering for improved handling.


Well, time to start clearing out the projects Smile, in my last entry, I’d reinforced the front of the camper tub to remove some flexing I didn’t like in the structure, in today’s entry, I will be recapping the upgrades to the charging system, starting on the truck end of the equation.

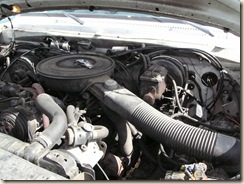
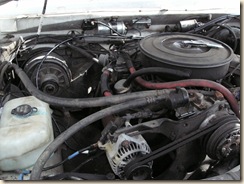
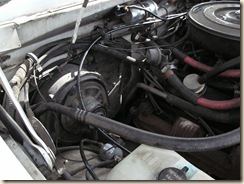
When I originally bought the truck, I decided I would wired in a charging circuit for a future truck camper.  At the time, I was figuring that the wiring only had to be heavy enough to support the amp load I would use, not taking into account the loss of voltage over long runs of wire. 

So, the original charging system was fed from the under-hood Group 27 deep cycle to the camper via rather under-sized 8 gauge wire through a 50 amp self-resetting circuit breaker and on to the 7 pin RV plug in the bed.  

At one time, there was also a diode isolator in this equation, but that was replaced with a RV-type constant duty solenoid switch after the one-way power flow caused by using a diode based isolator burned out the voltage regulator in the trucks PCM (why Dodge thought it was a good idea to put it there, I’ll never figure out). 

The solenoid that took the place of the diode isolator is situated on the passenger side rocker panel, next to the alternator and the onboard deep cycle battery, allowing for a nice short run of 2 gauge wire from the alternator.

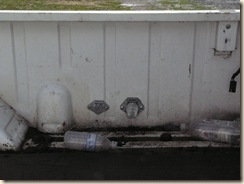
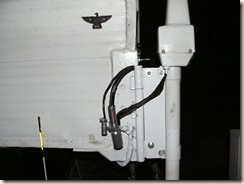
In the new rewire configuration, 4 gauge wire feeds come from the solenoid through a 100amp self resetting breaker before continuing on to a 100-amp rated lift gate plug that has taken the place of the old 7-pin RV plug in the truck bed.

P1110369P1110367P1110368P1110366

P1110372

Thursday, September 22, 2011

Backlogged Projects: Introduction & Reinforcing front wall of camper tub

Well, sorry for the dead month, but there really wasn’t much going on, the KIT and I haven’t really gone anywhere since April of this year.  Sure, the truck’s undergone a great dually conversion, but other than towing my neighbor, Joy’s, Komfort-25 travel trailer to the storage yard, she really hasn’t undergone a full camper test.

But, that’s all about to change Smile.   I’ve got work again!

Not only that, but in two short weeks, the Redneck Express, Dawn, Moby, and I plan to hit the road for the 2011 Fall Colors Rally!


Oh, but there’s a slight problem, or two.

Namely, the camper’s in need of some maintenance work that I’ve had to put off for roughly seven months due to a shortage of funds.  Oh, God, is there a lot of maintenance….


1.) Charging System needs to be rewired (Again), converter relocated from under the kitchen sink to under the dinette, right next to the batteries (Something I should have done when I rewired the charging system back in 2009, but didn’t).   Plus, a new Battery Disconnect needs to be installed, the original 75amp Pollack switch is falling apart. 

Also, I need to incorporate my battery voltage meter center that I fashioned into the electrical system so I can actually watch my battery charge. 


2.) The two Trojan SCS225 Deep cycles on the camper that I bought for a steal back in 2006 also need replacing, they no longer hold a good charge anymore, odds are one of the batteries is shorted.


3.) New Camper plugs need to be installed, replacing the under-rated RV 7 pin hook up with a 100amp Lift-gate plug for the charging wires and a separate 4-pin round plug for the running lights.  Charge wiring coming from the alternator needs to be fully scrapped and replaced with a good 4 gauge run instead of the under-rated 8 gauge system I put in back in 2006.


4.) Front of the Camper’s tub needs to have a bolstering frame built onto it, it has always flexed and moved too much whenever the camper has been lifted for loading and unloading.


5.) The 3 year old Shurflo Extreme Smart Sensor 4.0 water pump needs to be replaced (fortunately, Shurflo replaced this as a “Good Will” warranty exchange, since I bought the pump in ‘09, but it was manufactured in 2007) as it has started leaking water around the body and is pushing pressure back towards the tank. 


6.) Replace the broken down intermediate steering linkage on the truck to tighten up the steering for improved handling.


There’s some other smaller things, like a second smaller mesh cargo net that I ordered from CargoGear.com to hold the rest of the books on the cabover shelf in place while underway, getting the pivot pieces for my wobbl-stopprs, and physically getting the camper back on the truck without breaking my screen room next to it, but those are the less worrisome projects Smile.


So, my plan is to run as series of “Backlogged Project” posts to bring everyone up to speed on what I’ve done to the camper and truck to get her Rally ready, starting with the Camper Tub front wall reinforcement project.


P1110157P1110160


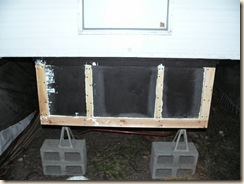
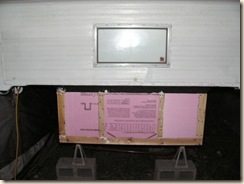
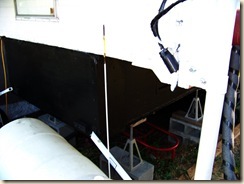
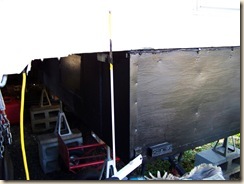
This particular project wasn’t exceedingly complicated, it basically involved sanding off the paint on the front of the camper tub at the points where I planned to glue (w/3M 5200 Marine Adhesive) and screw the reinforcing frame to the existing plywood wall and the expose 1x4 cross member below the siding line. 

I used some left over 3/4” pink down insulation board to help bolster the R-value of the water tank since I was framing that area in anyway. 

Then, I put down a good coating of 3M 5200 along the framing and glued and screwed a pieces of 1/4” plywood to the new framing members and the expose frame member that ran along below the siding. 

Using narrower pieces of the same plywood, I glued and screwed into the side of the existing camper tub and the new bolstering frame to help join it all together from both the sides and front. 

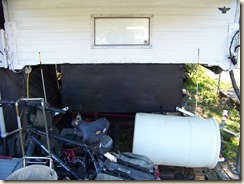
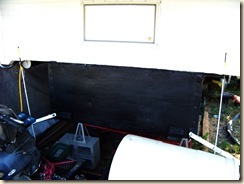
Once the glue dried, I installed some new corner flashing to protect the plywood, gave it two coats of Urethane-based primer and paint, and viola! one reinforced front wall Smile.

100_4547100_4548100_4549100_4550


The funny part is my camper wall along the front is now actually flush the whole length, something it never was before.   Also, since I had more meat to screw into, I moved my rub guards inwards a little to a position similar to the rubber ones you find on a new camper. 

One backlogged project down, several to go!