Friday, October 31, 2008

Another Trip down Vintage Lane? Or odd scary Halloween Sight?

Hey Folks, want to wish you all a happy Halloween :) Was browsing some of the Halloween threads today, and between some of the cuter photoshop jobs some folks had done with their rigs, someone posted a picture of this:


Now, its up to you to decide if that's scary or not, but I remember these old mechanical pumps and the little ding they made as you rolled over the next dollar. Kinda almost felt a bit more personal than today's monolithic electronic pumps.

Monday, October 20, 2008

Project #14 - Water Heater Replacement

Well, here's the follow up on the water heater replacement. The original thread can be read here:

Talk about a service life, 34 years!


I bought my new water heater, along with the gas line conversion kit (Basically the right length of flexible gas line and a 90 degree brass elbow to attach it to the original water heater connection ), and the flush water heater door. I also picked up a tube of ProFlex, and a roll of buytl tape both of which I used the majority of up installing the water heater. I also picked up a can of injection foam to fill in around the water heater to give it a good air/water tight seal.

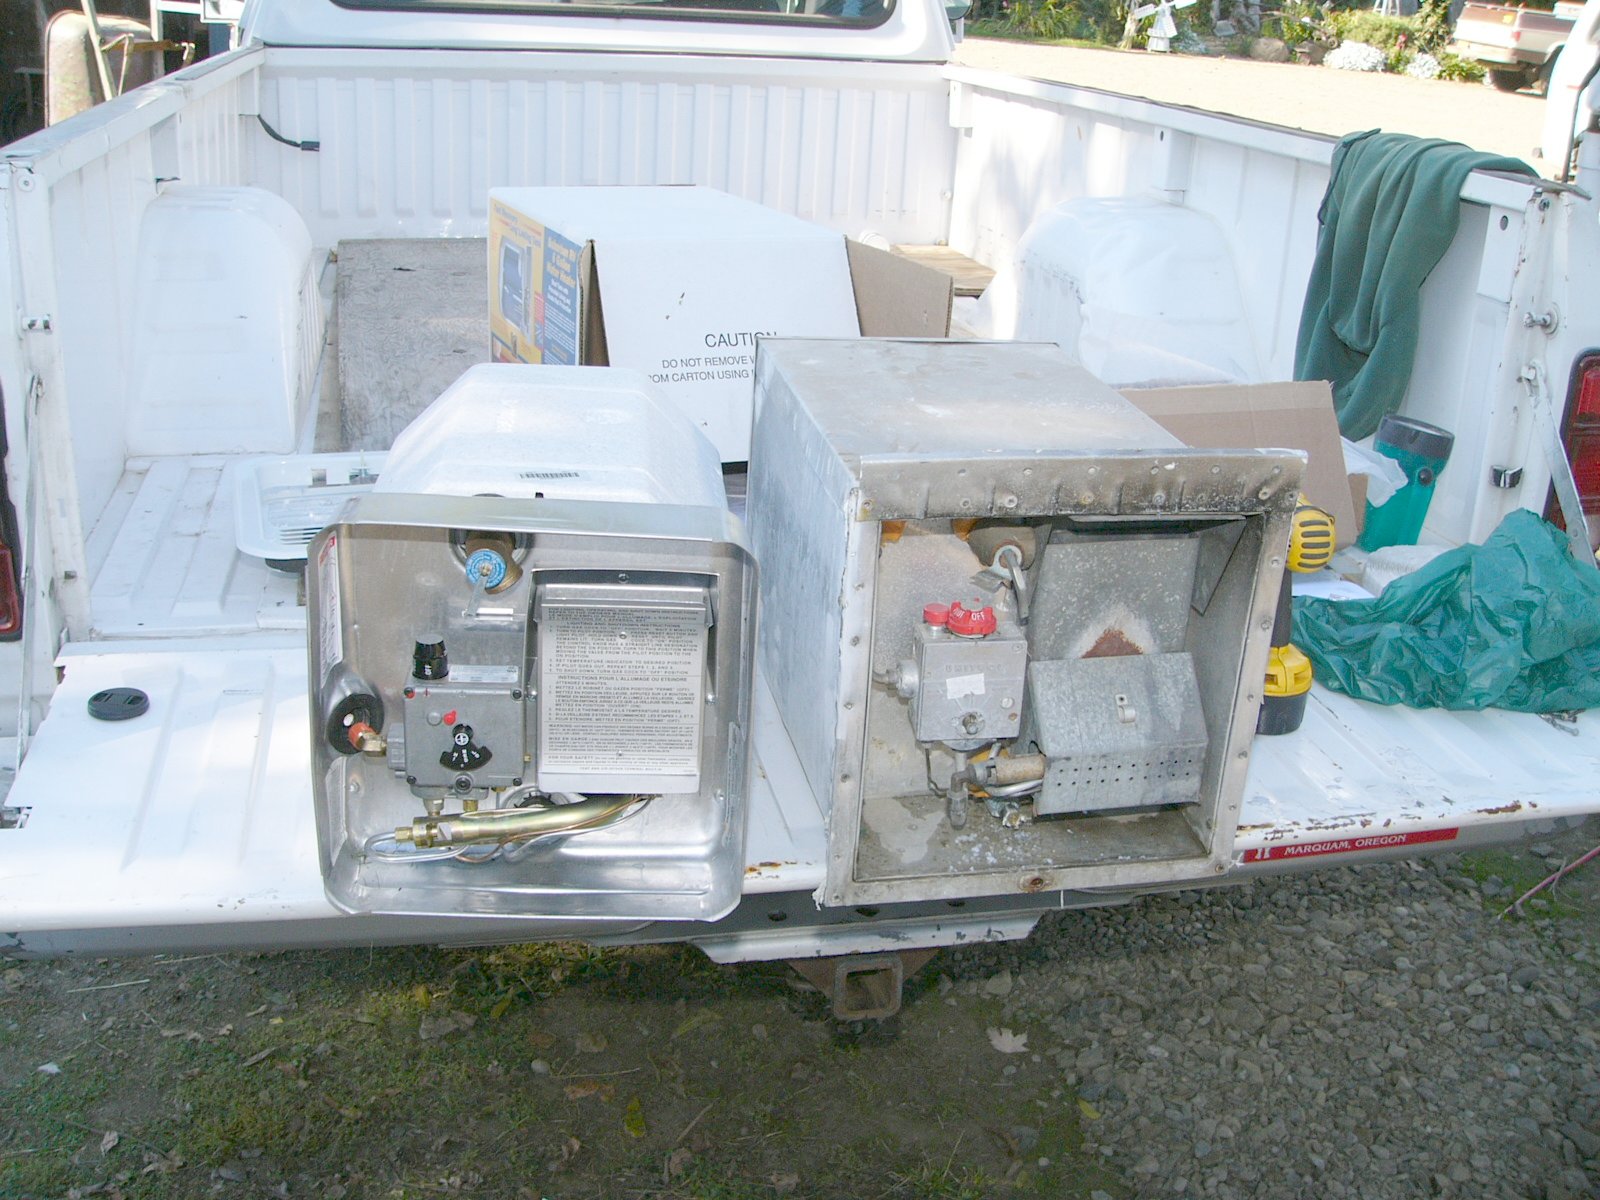
Here you can see the old water heater sitting next to its replacement:


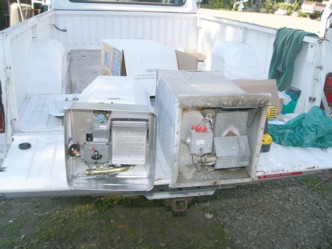
The old water heater was housed in a sheet metal box, the sides of which were stapled along the edges and the back. As far as I can tell, its made out of wood. The water heater itself is in the center wrapped in some kind of white insulation that looks a bit like fiberglass. I didn't open it up to look, as I have a sneaking suspicion that it may be Asbestos-based insulation. I had long ago filled in all the openings in the sheet metal housing with expanding foam to prevent any dust or fume leakage.

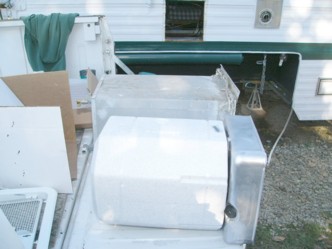
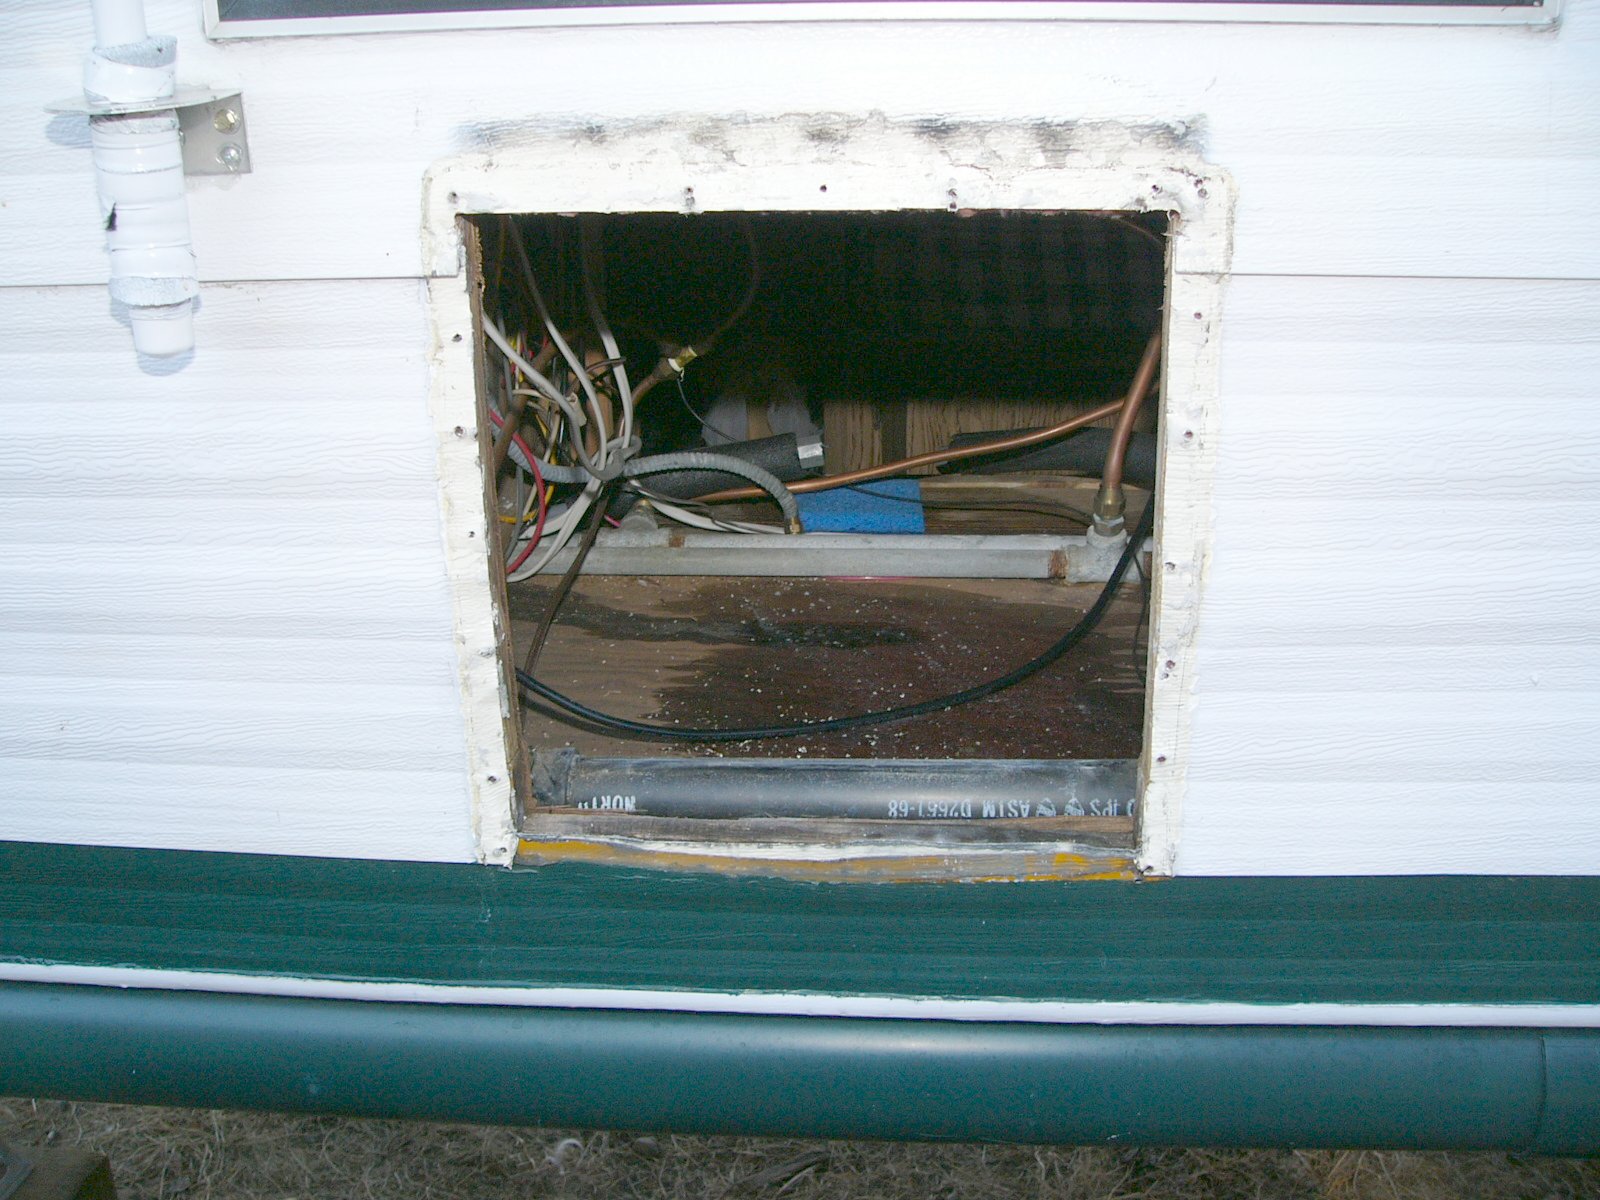
Here's the opening it came out of:


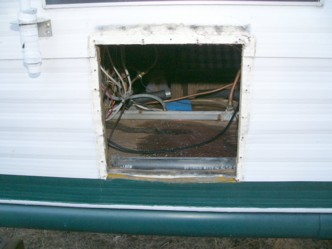
A little closer inspection revealed (The water on the bottom of the compartment is runoff from when I unhooked the plumbing):


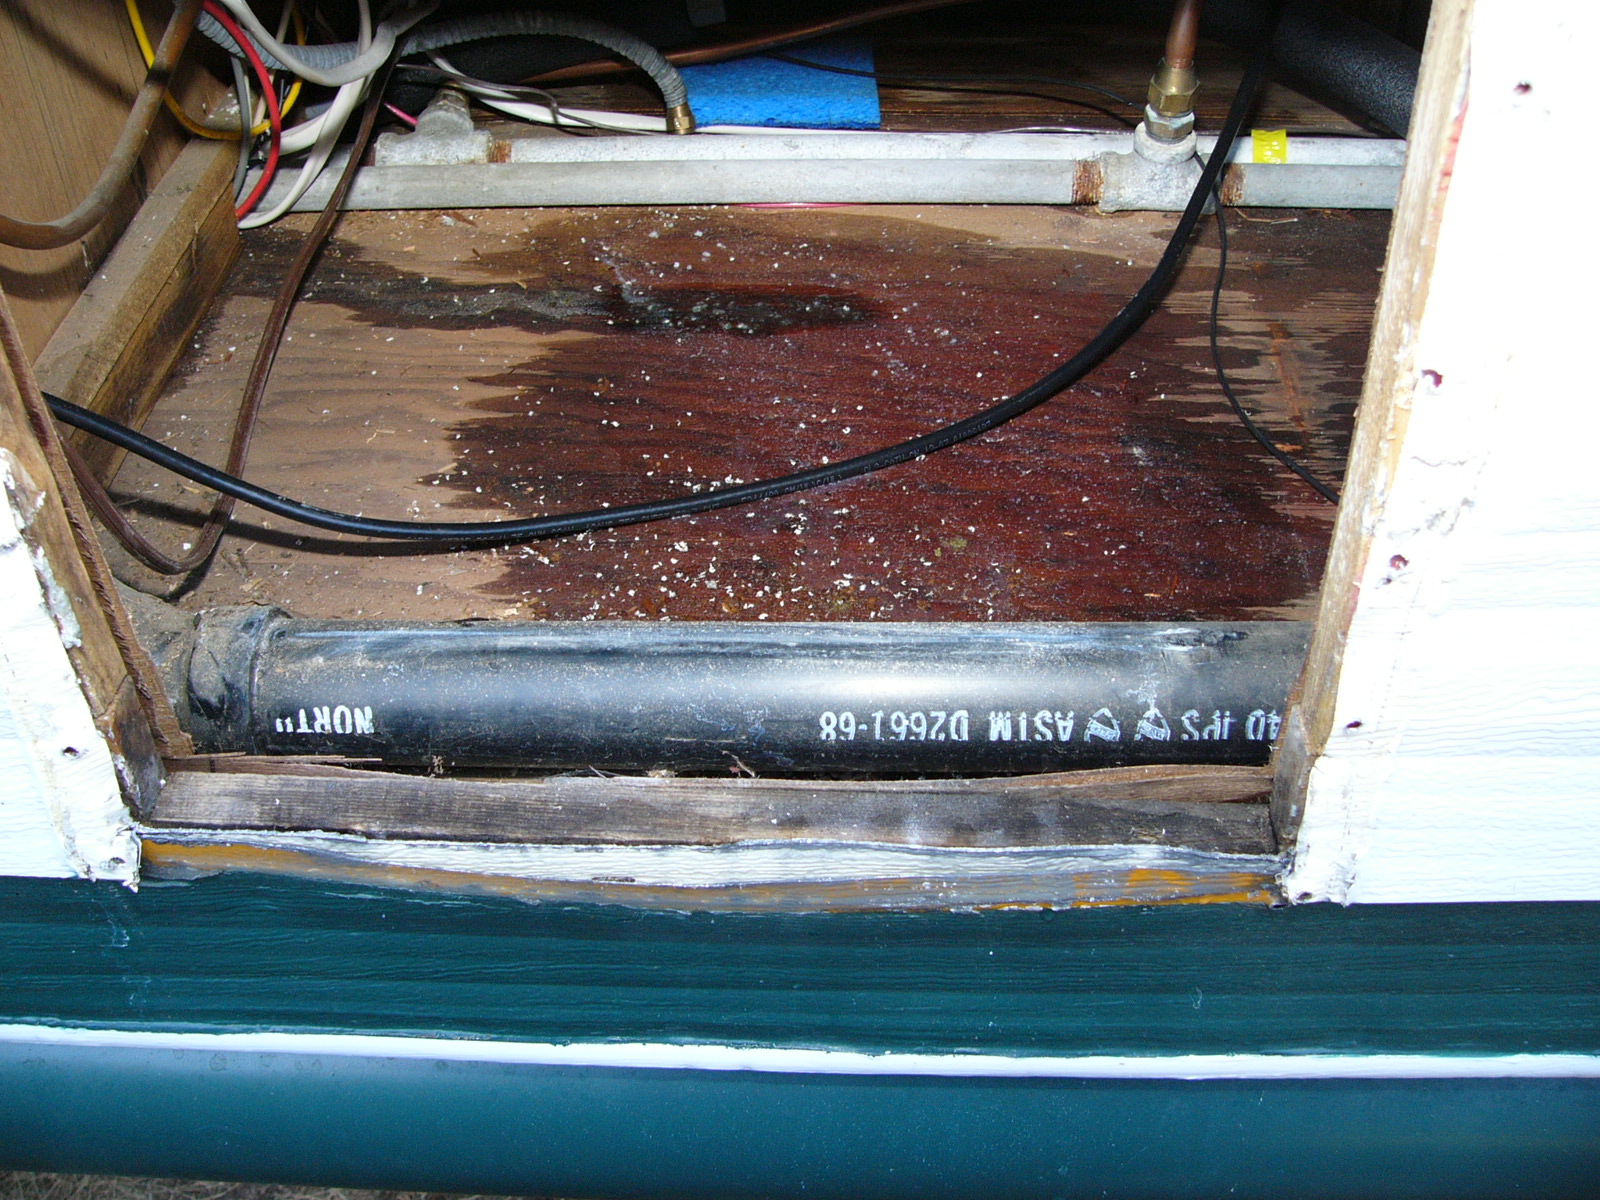
That the little 1x2 that sits underneath the edge of the water heater had begun to dry rot. Fortunately, its not structural, its just stapled in between the bigger 1x4s that are on either side that run along the top of the wing. All it does is support the edge of the water heater.

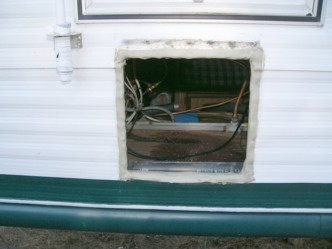
Since I didn't have anything to replace it with, or the time to do it, I packed it in a bed of butyl tape and sealed the laps in the siding to prevent any further water damage. The wood on either side and below it are fine and the water damage doesn't extend past the one 1x2 that was directly under the water heater. Odds are this was caused by water wicking back from the bottom edge of the water heater compartment, the water heater didn't have any caulking around it when I bought the camper, and I sealed it up at that point. Since the wood was dry when I checked it, I'd wager the water penetration had been stopped at that time and had progressed no further.


Since the water heater really didn't have any particular screw-down-here spots on it, I drove some two inch screws into the vertical members running on either side of the water heater to secure it in place. These I had salvaged from the removal of the original water heater and were still in good condition.

Unlike the Radius edged door you can get for this water heater, the Flush mount has no screws that actually drive into the sides of the camper. It has several screws on the inside that screw into the water heater itself and suck the face plate down. To make certain it was sealed tight, I put a double bead of proflex around the flange that slides into the water heater itself and put a thick coat of butyl tape along the edges of the door assembly. The caulk on the flange will seal the door to the water heater to prevent water from wicking between the two. Once the face plate was sucked down, I caulked around the door frame and sealed her up tight to the camper.


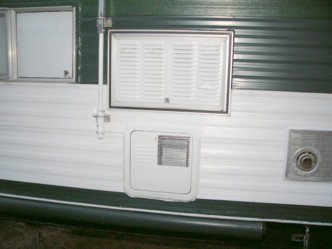
A couple of quick shots of spray paint, and the water heater install is done.

Thanks for reading!

Truck Campers to the EXTREME! - Mammoth Campers in Prinville, OR

There's an old saying, "Bigger is always Better", and I'd have to say Mammoth Campers out of Prinville, Oregon, has built that phrase into to a T in their new Truck camper.


The brainchild of Daryn Jones, he designed and manufactured his Mammoth Camper especially for use on a flat bed truck and in extreme cold weather conditions.

Constructed of high-strength aluminum and quality materials, Daryn has perhaps created the ultimate of Truck Campers.

The best part is, if you want one, Daryn is producing these campers for others besides himself, simply visit Mammoth's website back at the top of this post to learn more about these crazy-huge rigs!

Friday, October 10, 2008

Where have all the old fashioned pickup gun racks gone... Long time Passing...

The title is actually a good question, none of the local sporting goods stores had the blasted things!

In the end, wound up order this one from Amazon.com.

San Angelo #10070 3 Gun Locking Rack
Now, yer probably asking, Why does he need a gun rack?

The answer'll blow yer mind!
.
.
.
.
.
.
.
.
.
.
.
.
.
.
.
.
To hold fishing poles.

Told ya it'd blow yer mind!

Humidity, the enemy of all Full-Timers

Well, winter is coming upon me now, and the long periods of dry weather and air conditioning are giving way to days upon days of rain.

High moisture content in your air is a bad thing when you live inside a 7 1/2 x 18 foot box! Its more so a problem when the air in the cabover bed area doesn't move worth a damn.

I wound up needing to find a solution to my condensation problems.

photo of ADS-400 Mini Dehumidifier I wound up settling after much discussion with fellow campers on the NewAir ADS-400 Mini Humidifier from Air N' Water Inc for around $50 (they had a sale on at the time) and it came with free shipping.

I purchased this particular unit because of its size (roughly the size of an electric coffee maker) and the fact that it could run off its own 110volt power brick, or a 12 volt cigarette plug.

I initially set the unit up at the foot of my bed where I had the most trouble with condensation build up and used its 110 volt brick.

I installed a cigarette lighter outlet up in the cab over after discovering that the dehumidifier's brick got dangerously hot when in constant use. The unit actually worked better running off the camper's 12-volt feed than it did running off the brick.

The unit ran fine for about 6-7 months before the fan started to screech like the brakes on a run-away semi truck. You could "bop" the top of the unit periodically and it would stop squealing for a while, but it would eventually start back up.

This worked okay until the time I came home to visit family for Christmas (also about the time I was moving off the farm and over to my new living location closer to work) and a gave the unit a bop and the blades on the fan broke.

I wound up having to dismantle the unit and replace the fan with a spare, higher flow computer fan I had stuffed away in a parts box.

After that the unit worked fine for quite some time.

Eventually, another problem cropped up in that the little tabs for the contact switches broke rather easily when attempting to remove the tank when it was full. The little safety switch that kept the unit from running when the tank was removed broke off leaving only the thin metal arm that actuated the switch.

A simple fix involving a quarter and a couple pieces of duct tape wound up fixing this problem.

Given all its problems, the unit did its job, but definitely wasn't the quality level demanded of its price tag.

Monday, October 6, 2008

A formula for figuring out those pesky tank capacities

Well, the other day I was out buying myself one of those rolling portable waste tanks (saves on loading and unloading the camper just to go to the dump station), and I was trying to figure out how big of capacity my holding tank was.

Well, while I was at the RV Parts Outlet store in Tualatin, I made mention I had no clue what my tank's capacity was. The shop owner then replied, "Do you have a general idea of what the Length, width, and height of the tank is?"

I replied I had a ballpark figure. To which he gave me this formula.


(Length (In inches) x Width (In inches) x Height (in inches)) / 231 = approximate gallon capacity.

Giving my ball park figure I came out to roughly 25 gallons. Bought the biggest tank they had on hand (11 gallon) and only had to fill it twice to dump the tank, so that formula works pretty darned good.

Just thought I'd pass it along to anyone who buys a camper, but can't find the tank capacity, but can get the measurements on their tank.

Wednesday, October 1, 2008

Another Round of Vintage Campers

Uncertain as to the vintage of any of these campers, though my guess is sometime during the mid-to-late 60s.

I thought it was about time I added another round of pictures of American RVing History, back from the golden days of long ago...

"Little Champ" - By Champion


Even in the Old Days, folks used front cargo racks...


For all you Dreamer Fans out there...