Showing posts with label Truck Camper. Show all posts

Friday, July 3, 2020

Rebuilding “Ms. Merry” the Amerigo– And the Story of the Flimsy bed–Part 4

During Part 3, I mentioned that other work was going on while the glue and fiberglass cured on Ms. Merry's new Snap-n-Nap Wings, so in Part 4, we'll cover the work going on inside Ms. Merry's Snap-N-Nap to prep for the installation of the new wing walls :).

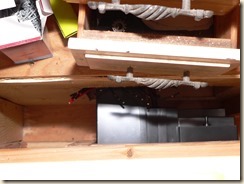
To start off, here's Merry's Snap-N-Nap Bed with the mattress finally removed!  The pan wood is actually in better shape than I was expecting, given the mildew smell that this area had been hanging onto.   Turns out the smell was actually coming from that nasty fabric wall covering they'd used.


The paneling on these sides was held on with a couple small pan-head screws and a very minimal amount of adhesive, I basically just had to push a putty knife between the wood and the aluminum and popped right off.


Time to start getting that nasty vinyl fabric wall mess out once and for all.....  To remove it, I simply ran a box knife along the joints to cut it and pulled it out by hand.   The vinyl is carpet foam backed type stuff and is only held on with spray adhesive.  As I tore it off, I discovered that moisture had gotten in around the window at some point and had soaked into this nasty fabric as the back of it was stained with old mildew and mold spots.


Yay.... more spray foam.....That's all going to have be scrapped off so we can come back later and install some wooden framing along the perimeter for installing proper insulation board and wall paneling later.  Mercifully, a rubber mallet and a putty knife pops it off the fiberglass in nice big chunks, leaving little residue behind. 


The wooden "floor", and I use that term loosely, was simply held in by two 1/4" headed hex head screws, with them removed it lifted right out. Sadly, I forgot to take a picture of the laughable 1/8" thick fiberglass insulation mat that was underneath the aluminum sheet that makes up the bed pan's outer skin and the wall paneling floor that was in place.


So, my next discovery of stupid was the fact that they had glued the wiring for the tail lights on the inside.... to the foam.... Which makes zero sense, because there's a nice cavity specifically for pulling wires inside of, formed into the fiberglass wall!!!


Fixing this wasn't hard, just annoying, as I had to remove the new tail lights had I installed a couple years back so I could run my fish tape through the wiring cavity and re-pull the wires like they should have been done from the factory. Also took a moment to drill a new entry hole into the top edge of the cavity so that the wires going up to where they pass through the bulk head would be able to be placed behind the new wall insulation.


This also gave us a moment to remove the original plastic license plate light/mount, which some tourist decided to help themselves to the original Washington License plate a couple years ago by breaking off the lower part of the mount. I'll return in a later chapter to show the new one installed after sealing the original holes and installing the new steel mount.


Once the wiring was taken care of, I set about cutting 1/2" polyisocyanurate foam insulation to put in the voids in the bed pan frame (there was no insulation here from factory). As its wasn't practical to remove the aluminum skin that makes up the outer skin of the bed pan, and because there's nothing on the outside of the bed pan on the back section that's up in the clamshell, we'll push the insulation in place in those sections later.


Using the original pieces as patterns, I traced out new wall paneling and reinstalled in into place along the perimeter walls.


And this is the new bolstering floor frame that is being installed in the bed and and will be sandwich anchored to the original aluminum framed pan floor, which was way too thin to safely support an adult sleeping in this bed.   This floor, which is based upon the design and materials used in the cabover floor of Mr. KIT, which supported two adults sleeping on it for years, will be more than durable enough for the single adult that will generally be using this bed.   So far, its been weight tested up to 380lbs (AKA I crawled on it) without any bowing or buckling, and this was before the insulation or plywood floor was glued and anchored on top. 


More 3/4" polyisocyanurate foam board :). In case folks are wondering why I use this type of foam, its because unlike polystyrene foam found in most RVs, it has nearly double the RV value for equivalent thinkness. Most of Ms. Merry's walls are rated at at least R10 or higher, where the same thickness in polystyrene only yields R4 at best. Since we do alot of camping in cooler temps, bolstering the insulation factor of the walls will help keep the furnace from having to cycle on as much while dry camping or urban boondocking.


And last, but not least, the new plywood floor is in :)


This wraps up Part 4, but there's still much more to post! So stay tuned, I'll be adding more in the upcoming days. :)

Sunday, June 21, 2020

Rebuilding “Ms. Merry” the Amerigo– And the Story of the Flimsy bed–Part 2

Part 2 of  the ongoing rebuilding saga of Ms. Merry's Snap-N-Nap!   When we left off yesterday, we'd discovered that the flimsy plastic of the accordion wings was all that was holding the bed pan to the outer clamshell of the Snap-N-Nap bed, which wasn't exactly a very strong setup.

We'd hoped that after doing some more digging in the interior that we'd find another piece of wood fiberglassed into the wall of the outer clamshell that was supposed to have a piano hinge attached to it to bear the load of the bed, unfortunately, during today's investigations, what we thought was wood was actually just dirt inside in hollow cavity that was formed in the fiberglass to allow wiring to run for the tail lights, so sadly, we're going to need to rebuild the wings as they were.

Since we can't change the design, I decided to go with rebuilding the wings from scratch and building them so that they're a proper structural piece made of a laminated truss.

To start, I used the dismantled wings to trace out the pattern of the original design on some thinner door skin plywood I had on hand for this sort of thing, then cut out two new uppers and lowers.


The wings were made out of this sanded plywood because we'll be coming back once these are fully laminated together and finishing the exterior sides and frame edges with fiberglass resin and then painting it with a glossy polar white epoxy paint to match the sides of the Ms. Merry.

Compared to pre-made filon, these are thicker and much more structural stout.   The center of the Uppers and Lowers will be filled with foil-sided Polyisocyanurate insulation foam which will be glued and laminated in as part of the wing structure. 

For the main structure, I used 1x4 and 1x3 lumber to make the frame, with 1x4s used along the edges that would be getting clamped in place when the bed is deployed so that latched could be attached to the wings allowing me to remove the hinged clamp boards that were used originally in the camper. 


A quick side by side of the new lower and the original with its non-structural loose wooden interior pieces.   That wood is only attached loosely to the outside plastic, and what was bearing all the load of the deployed bed pan and carrying the load into the outer clamshell structure. 

The only thing carrying all that weight is that disintegrating plastic, it literally was crumbling under my fingers, I am truthfully amazed the bed didn't drop out, when the Snap-N-Nap was used for storing building materials in the past couple years.

Another side by side, and yes, the new wing is built the right direction.  Gardner Industries used the same wing piece for both sides, so on one side the seam of the overlapping plastic faced inwards, on the other it faced outward.   With the thin fiberglass insulation removed, you can see the original color of the Snap-N-Nap wings, and how much they've yellowed in the last forty-five years!


Ran out of time today to get the last upper assembled, but all the pieces were cut, and tomorrow I'll be able to finish the assembly and start cutting the new insulation and trace out the inner skins.


And here's one of the new sides test laid out on the workbench :).  I'll likely  trim the little corner on the upper so that it ends flush with the lower (This is an exact trace of the sides, and they're not the same size, and there's no real purpose to one being half an inch longer than the other). 

These should be a tad stronger than the flimsy plastic originals and I won't have to worry about them catastrophically failing while on a trip. 

Rebuilding “Ms. Merry” the Amerigo– And the Story of the Flimsy bed–Part 1

So, once again, Ms. Merry and Jake the Pickup have slumbered through another soggy miserable Oregon winter, hoping that this year, THIS year, the Fat Man in the Orange Dodge hat with the power tools will finally be finished rebuilding Merry so that they can all escape from the Madness that has been 2020 and go to the more important places, the places where there’s more fish than there is people, because the Fat Man has grown extremely tired of people and their stupidity and would prefer the company of his wife, their cats, their camper, and a lot of fish and very few people. 

This brings us to today Smile.  For the past few weeks, the Fat Man in the orange hat has been collecting supplies again to make sure that they have enough materials to work on Merry for the next couple months without needing to deal with crowds of people.   In the years past, The Fat man wouldn’t be bothered by them, but with the world darkened by a new sickness from China, the Fat Man has been spending many tiring months working and doing little else than walk from bed to the work computer, sit there for twelve hours, then go back to bed, with food sometimes mixed in between.   The never ceasing rain has not helped the Fat man much, so any sliver of it not being a dreary, drippy day on the weekend (The weather has been doing a fine job of being nice on those long days when he’s trapped inside working, and returning to absolute piss when the weekend finally arrives for the last two months), he grabs.  

Today, he decided to finally start tackling Ms. Merry’s Snap-N-Nap rear bed, the very last piece of Ms. Merry that hadn’t been changed since he brought her home several years ago.   It is still “resplendent” in its spray glued vinyl covering that at one time was white, but has yellowed and aged, and tacky 70s paneling.   He has many plans, plans to remove the original accordion sides and replace them with a single hinged fold down side that latches in place on the rear shell, allow the bed to have a thicker mattress and to fix the design flaws that rely on the rubber rain covers for the hinges to close gigantic holes in the corners of the snap-n-nap when its folded open.  

Little did he know what new madness he would discover……

------

Hello, again, everyone!   Its been a long time since I last worked on Jake and Merry, and as I dramatized above, its been a rather poor winter and the world’s been a festering disaster since February, and I’m looking forward to trying to actually get them finished this year.   With me working from home part of the week and part on, being able to dive into work on Merry as the weather stabilizes will be a nice change. 

So, the story of the Flimsy Bed (AKA the Who-thought-this-was-a-good-idea! Bed).  

I call it this, because I’ve either found a ludicrous design choice that Gardner Industries made to cut corners and pinch pennies that could of potentially led to a lawsuit, or the last missing part in the Oil Embargo special that seems to have highlighted Merry’s original construction from day one of this restoration project. 

Since I was starting back into the home stretch on Merry, I decided that I would start the year by completing some of the last big lift items that still needed doing, the Snap-N-Nap being a big one that’s still as it was when I bought the camper.  I had always planned to remove the nasty, tacky vinyl and reinforce the bed pan because my earliest observations were the aluminum frame and door skin were really not strong enough to handle an adult sleeping in that bed much before things started to break.   Part of that plan involved reinforcing the floor by adding additional support structure as much as reasonable without making the bed too heavy, a proper plywood floor, and changing the accordion wings to a properly sealing design.  

Most Amerigo owners pride themselves on that rear bed with its automatically opening and closing wings, however, in almost all cases, the thin thermoformed plastic shells are almost always disintegrating by the time any of us get ahold of them and while they can be glued and patched, that plastic is still brittle and forty years or more old.   So, my plan was to completely remove them, and make a solid single hinged wing that would fold up against the “ceiling” of the Snap N Nap and be held in place by a sliding latch, one of the same ones that would later be used to latch the wall in the down position after the bed was opened so that it compressed tightly to the new sealing surfaces and make the snap-n-nap airtight and water tight to the elements, something the original design was lacking and tried to make up for with large amounts of vinyl. 

Unfortunately, like everything else in Ms. Merry, the wooden anchor bar at the top of the snap and nap sides was installed with those damnable double inward crescent security screws.    Since said screws just went through a piece of one by one cheap yellow pine, I just drilled holes in the wood near the screw heads through the piece and then wedged a flat head screw driver in the hole to split the wood and separate it from the screws, allowing me to pull the side down, so I could then use a 1/4” socket on my drill to disassemble the rest of the accordion for removal. 

What I wasn’t anticipating to find was that the only thing attaching the bed pan to the outer clam shell of the snap-n-nap was these flimsy plastic accordion sides that have no structural frames at all inside them.   I expected there to be a second piano hinge along the top far edge of bed pan that attached it where it met the clamshell so that the bed was hanging from the rear wall and the clamshell at two points with the sides just being attached so that they would automatically open and close.


Investigating behind the rotten vinyl I can even feel what appears to be a 1x4 piece of wood embedded into the fiberglass of the clam shell at the height where that piano hinge should be.  I don’t know, as these pictures are the first I’ve ever seen of the inside of an Amerigo’s Snap-N-Nap accordion sides, if this was by design, which makes little sense, given the wood you see in the pictures isn’t even attached to one another, they simply line the edges and are held inside the clam shell by a couple staples through the plastic.   There is absolutely no way these were mean to the load of that bed and its occupant, there’s simply not enough structural integrity to them to do that.
I might have believe it possibly the case, had these been welded aluminum frames or the wood was actually attached to one another, but there is literally nothing structural to these, and I seriously cannot believe a company would think a thin strip of Vinyl would be enough for a load baring hinge. 

My only conclusions I can draw are, there was a hinge that was supposed to have been installed, it never was.   Some previous owner removed it and never reinstalled it, but there’s no evidence of one ever having been installed.


Directly behind that vinyl below that screw strip is that "potential" 1x4 piece of embedded wood.  The bed pan is currently hanging low on this corner because the side has been removed.   I’ll be setting up a cradle tomorrow to support the bed pan so I can fully detach the clam shell from it and set about installing the missing hinge. 

From what I’ve peaked behind the vinyl I’ve pulled free, its a very real possibility I may need to glue a 1x2 frame onto the fiberglass to give me a surface to anchor the RV wall paneling to to install it. 

So, welcome back to the restoration adventure, I’ll try to post updates as often as I can, so stay tuned! Smile

Sunday, August 11, 2019

Rebuilding “Ms. Merry” the Amerigo–Merry goes to the wall – Part 1


Progress has been a bit slow on Merry in the last couple weeks, partly due to the ER visit a couple weeks ago, due a nose bleed that wouldn’t stop.


But, its good progress that is being made!


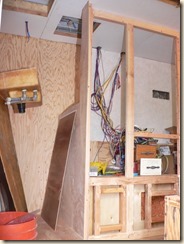
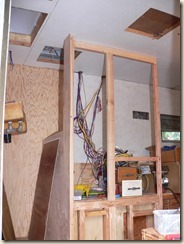
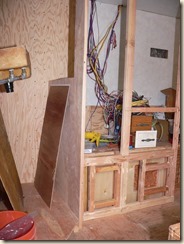
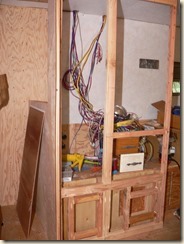
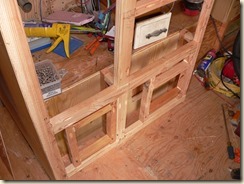
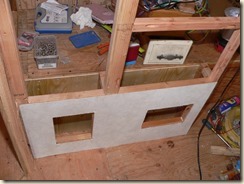
Already, we have the first of the inner bathroom walls in, plus the main cabinet wall frame is now in as well!  

I pulled the sink during this, as it still needs the bottom edge trimmed to match the slope of the new bathroom floor (It slopes down to the drain point), once its trimmed I can start building the rest of the inner wall frame that will get tied into that open large gap on the left.  

We ended up building the cabinet wall to be a bit extra sturdy because it will be carrying a big hunk of the Air Conditioner load on the roof down to the floor of the camper, helping to keep the roof crowned and from sagging under the weight of the unit as time passes. 

P1080834P1080835P1080836P1080839

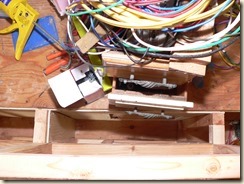
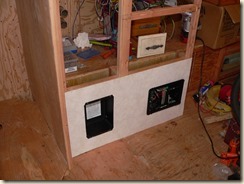
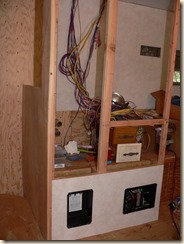
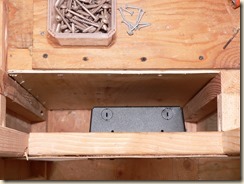
The small framed in openings in the lower section are for a Cadet Com-Pak 1000watt in-wall electric heater (Our secondary heat system, borrowed from NetBoy’s design that they did so many years ago, been waiting years to use that one Winking smile) on the left and the new Progressive Dynamics dist ribution panel on the right.

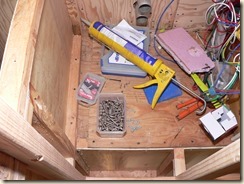
The notch out in the wall behind it is so that there is path for the air moving through the 3-stage converter to travel (I actually ended up cutting the plastic back section off the panel near the board and heat sinks so that the air could travel trough that tunnel space, there’s going to be a little grate in the corner wall near the kitchen for the air movement so the blower can properly cool the converter).


P1080843P1080844P1080845

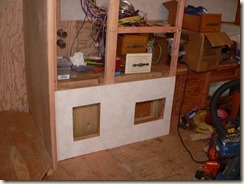
With the wall panel installed Smile.   The upper section will have the finished maple frame installed on it covering over the framing.   One thing we’re doing different is I’m getting rid of the two drawers below the main wardrobe cabinet in favor of another cabinet space, in which we plan to store the towels.  This cabinet will have a removable false bottom to sit above the wires and pipes that will be running underneath which can be easily lifted out if service work needs to be done.  

P1080846P1080847

With the Progressive Dynamics Power Panel and the can for the heater temporarily installed in place.

P1080848P1080852

You can see that our heater has ample clearance around it and a bit more clearly on how the indent works for the back of the distribution panel.   Soon, we’ll be able to take that giant spaghetti of wires and bundle them together and finally tie them into something!  

P1080849P1080851

Tuesday, July 17, 2018

Rebuilding “Ms. Merry” the Amerigo–On all four feet again

Another major hurdle has finally been completed on Ms. Merry’s restoration!

After three years of basically being deprived of jacks, Merry at last has all four of her jack brackets installed and all four of her jacks attached.   

The Atwood brothers are still without power, so I have to get them up and down, I still need to stand there and spin the crank, but for the first time since I started restoring Merry, she’s on her feet again, and this time, with proper framing and mounts to do the job Smile

Since I did the driver’s side corner during the off season and didn’t document any of the process, we’ll be looking at Merry’s passenger side, as the process was fairly identical.   Again, I ended up focusing more on the end product, and not so much the blog, so some parts were left unphotographed.

To start off with, we had to remove Merry’s propane compartment, it had been temporarily reinstalled back in 2016 after the wall’s framing and wing had been replaced to keep water from getting into the camper during the rainy season.  

At the time, I had wanted to redo Merry’s compartment design some, as it was one of the major leak points, but we were out time and warm weather.   Once the late fall, early October rains set in, working outside becomes nigh on impossible.  

Now, that we’re at a point where removing the compartment and eventually the main door again is entirely feasible, I pulled the screws and had Merry’s propane compartment pulled within a few minutes.  

Once it was out, I set about adding a couple extra stiffeners to help give the 1/4” plywood a couple extra spots anchor in well to remove and bow from the wall framing when I jacked it up before installation to stretch the frame back into shape.  

With the stiffeners in, I cut the insulation boards that would go in around the propane compartment and the lower wall below the window back to the point where the full sheet that would be put in for the door would meet.  

With the insulation in place, I cut the section of plywood….

Discovered I’d inverted the digits on one of the measurements and then recut a new piece.   After dry fitting, I applied adhesive to all the wall framing and then screwed the plywood to the wall using 1-1/4” coated deck screws.  

I left Merry with her rear jacked up for about thirty-six hours before I returned her to normal resting position and then using my router and the Dremel Multi-tool, cut out the propane compartment opening.   I left the refrigerator door section for later.

P1150741P1150742P1150744P1150745

With the new plywood for the lower wall section in place, I went through my collection of scrap sections of plywood to make the sandwich up that would go between the framing in the front wall beneath the cabover and the fiberglass skin on the outside.  

On all Amerigo campers, the front wall slopes slightly away from the frame as it goes up to meet the floor of the cabover.   The framing inside is usually somewhere between five millimeters and half inch offset from the fiberglass in this area, making it a poor spot to attach a jack bracket, unless you build up the framing to be flush with the back of the fiberglass skin. 

To accomplish this, I used sections of 1/4” plywood and five millimeter plywood to create a laminated slope piece that was tapped into place and glued. 

Once these bracing boards were in place, I anchored the 1/4” angle iron inner reinforcement plates in the corner and then temporarily anchored the jack bracket in place on the outside using a couple of tec head screws so I could drill through the bolt holes on the frame and the backing plate.  

P1150743

I do these in place as its easier to drill the inner plate later than hope that you mathed your measurements for where the holes may line up, and discover they’re off.    Once the pilot points are set in the metal and the initial 1/4” holes drilled, I bump them up to take the 5/16” bolt holes plus a tiny amount of play so that I can compensate for the extra thickness of the sealant going on the back of the plates. 

The new brackets sandwich bolt through the corner’s massive 2x6 beams, plus have a plate on the underside that lifts up on the camper’s whole corner, so that the through bolts aren’t taking the load just by themselves.  

With the holes done, I applied the butyl tape to the back of the plates, and began the process of threading bolts into place.  

I gradually worked my way across all the bolts tightening them until I had even clamping pressure on all surfaces and the jack bracket was snug tight to the camper. 

Once the jack bracket was on, I redrilled out the original hole for the last owner had made for the electric jack plug, opting to reuse the one he’d installed so I didn’t have to fill his screw holes and make new ones for that corner.

P1150740P1150739

As you can see in the picture below, I had to offset the path the wires take through the wall to clear the new inner backing plate.   Once the wires are connected, they’ll be encased in chaff guard and a rubber gromett will secure the bundle so it doesn’t move around or get easily snagged on pots and pans that will later be stored in the lower cabinet on that side of the propane tank.  

P1150743

With both brackets now fully installed (caulking to be done later when I start doing all of the camper’s seams), I returned to the garage where Mr. KIT has been sleeping since 2012, and removed the last of the electric jacks I had bought for him so many years ago to give to Merry so that she could continue where he couldn’t.  

Mr. KIT will be returned his original hydraulic jacks, the seals redone so that he will be ready when the time comes to sail off one last time with his next captain.  

P1150746P1150747

As an extra bonus, we discovered that Mr. KIT’s swing out brackets had enough adjustability to completely compensate for the slight angle that Merry’s new front corner brackets lean at, bring the jacks up perfectly straight. 

Because Ms. Merry is a little narrower than Mr. KIT, we’ll need to get a couple of wider pieces of plate steel to replace the original widener plates to give Red enough space to get his wide hips through so Ms. Merry can rest on her own feet.  

In case you’re wondering where Ms. Merry’s front tie downs go, look closely at the pictures of the front jack mounts, you’ll see a large hole near the bottom, that hole is for the eye of a tie down to pass through to anchor her snugly to the tie down ear below on Red’s bed.  

This wraps up our work on Merry’s jacks, other than the electrical work to come, and the wider offset plates, Merry is now officially redesigned to use modern corner jacks and can safely be used off truck while standing on them alone, if wanted.  

Thanks for reading!   We’ll be back soon with the reassembly of Merry’s propane compartment and the first piece of interior cabinet framing to be installed!